Set Up Dynamic VLAN With RADIUS (for Nebula Switches only)
In this example, VLAN10 is configured on port 1 (P1) of the Nebula Device. The user creates the following two accounts in the RADIUS server (R):
• Account with VLAN100 assignment
• Account without VLAN assignment.
Scenario 1:
The login account passes IEEE 802.1x port authentication with dynamic VLAN assignment. Client (C) will connect to the network through VLAN100.
The login account passes IEEE 802.1x port authentication with dynamic VLAN assignment. Client (C) will connect to the network through VLAN100.
Scenario 2:
The login account passes IEEE 802.1x port authentication without dynamic VLAN assignment. Client (C) will connect to the network through VLAN10.
The login account passes IEEE 802.1x port authentication without dynamic VLAN assignment. Client (C) will connect to the network through VLAN10.
IEEE 802.1x Port Authentication With and Without Dynamic VLAN Assignment Example
To set up dynamic VLAN with RADIUS, do the following:
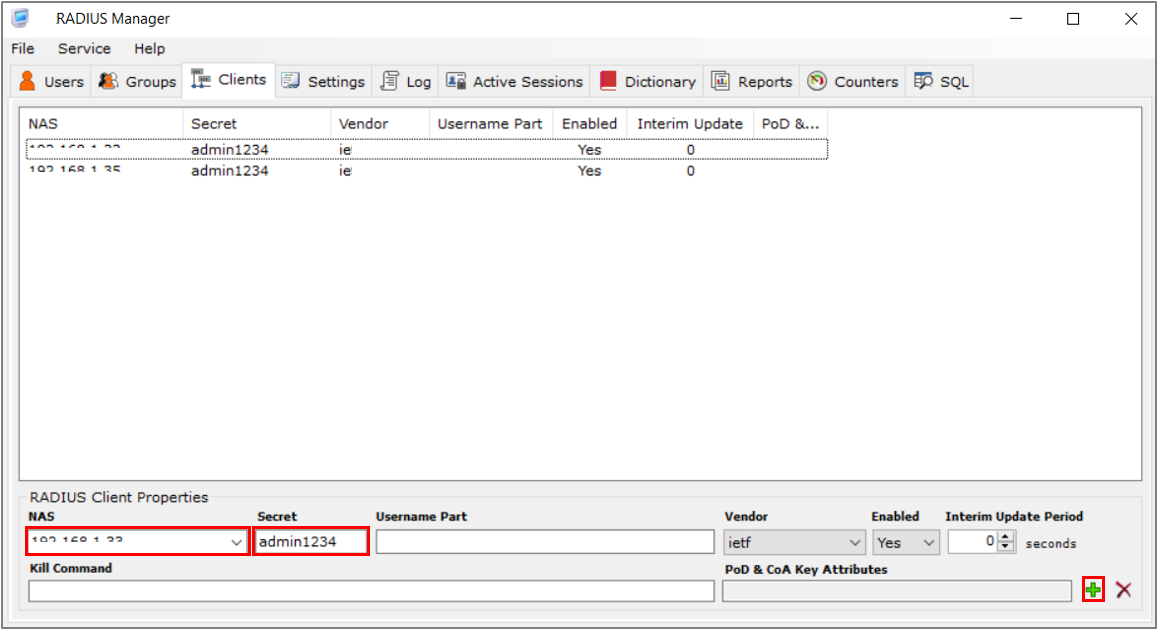
1 Configure the client list in the RADIUS server. In the example screen below, enter the management IP address of the Nebula Device in NAS. Enter the shared Secret (password) in your Switch > Configure > Authentication screen. Then click the add (+) button.
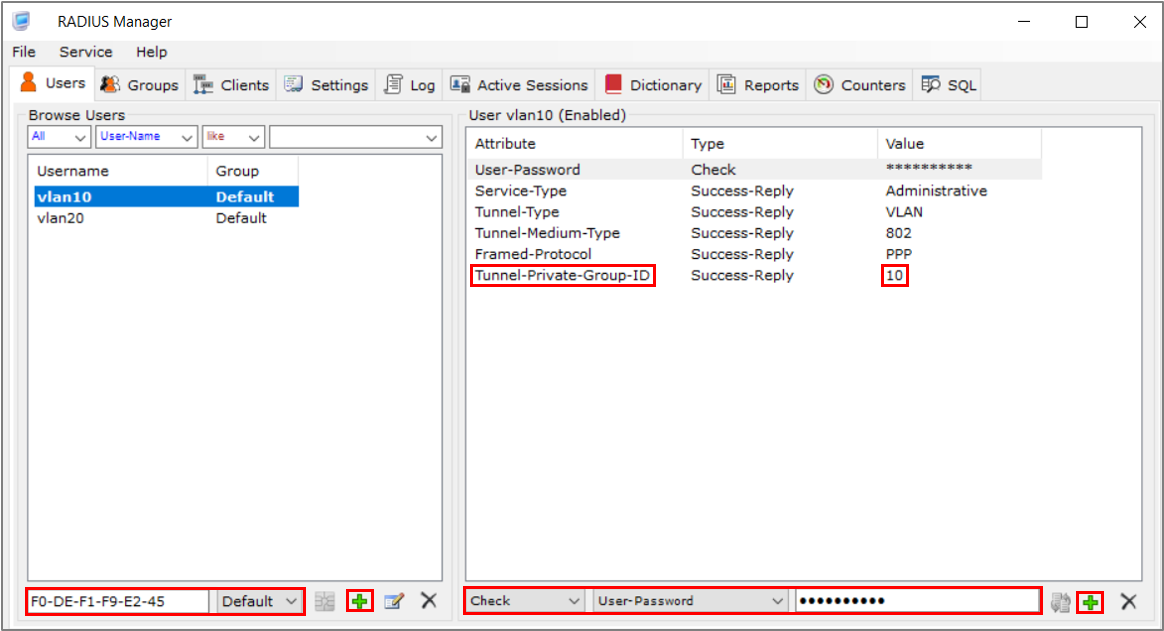
2 Create a user with dynamic VLAN attributes in the RADIUS server. In the example screen below, 10 in the Tunnel-Private-Group-ID is the value of the dynamic VLAN of this user account.
3 Go to Switch > Configure > Authentication to create the authentication policy.
3a Select the authentication server in Server type.
3b Click +Add in Authentication server to create a new RADIUS server entry.
3c Enter the IP address of the external RADIUS server in Host.
Enter the port of the RADIUS server for authentication (default 1812) in Port.
Enter a password (up to 32 alphanumeric characters) as the key to be shared between the external RADIUS server and the Nebula Device in Secret.
Enter the port of the RADIUS server for authentication (default 1812) in Port.
Enter a password (up to 32 alphanumeric characters) as the key to be shared between the external RADIUS server and the Nebula Device in Secret.
3d Click +Add in Authentication policy to create a new policy.
3e Enter a descriptive name for the policy in Name.
Select 802.1x in Authentication type to validate access to the ports based on the user name and password provided by the client.
Select 802.1x in Authentication type to validate access to the ports based on the user name and password provided by the client.
4 Go to Switch > Configure > Switch ports to bind the authentication policy to the Nebula Device access ports.
4a Select the port(s) and click Edit.
4b In the Update # port screen, select Access in Type.
Select 802.1X/VLAN Assignment in Auth. policy. Then click Update.
Select 802.1X/VLAN Assignment in Auth. policy. Then click Update.
5 Go to Switch > Configure > Switch ports to add the dynamic VLAN list to the allowed VLAN list of uplink ports.
5a Select the uplink port and click Edit.
5b In the Update # port screen, select Trunk in Type.
Enter the dynamic VLAN(s) in Allowed VLANs. Then click Update.
Enter the dynamic VLAN(s) in Allowed VLANs. Then click Update.