Configure Voice VLAN (for Nebula Switches only)
VoIP (voice over Internet protocol) devices are commonly in use in office environments. When designing a network, assign a higher priority to voice traffic. Use voice VLAN to prioritize voice packets from a VoIP device, and separate data packets from a computer.
As shown in the next figure, connect the VoIP device (P) to the Nebula Device (S) on one end. Connect the computer (C) to the VoIP device (P) on the other end. The VoIP device (P) serves as a bridge for both the Nebula Device (S) and computer (C).

The Nebula Device will add a VLAN tag for voice packets (V) and data packets (D) separately after receiving them. Then forward the voice packets (V) and data packets (D) to the uplink port (U). This section shows you how to separate data packets (D) and voice packets (V) between a VoIP device (P) and computer (C), without having to assign a VLAN tag.
Configure the Nebula Device Ports
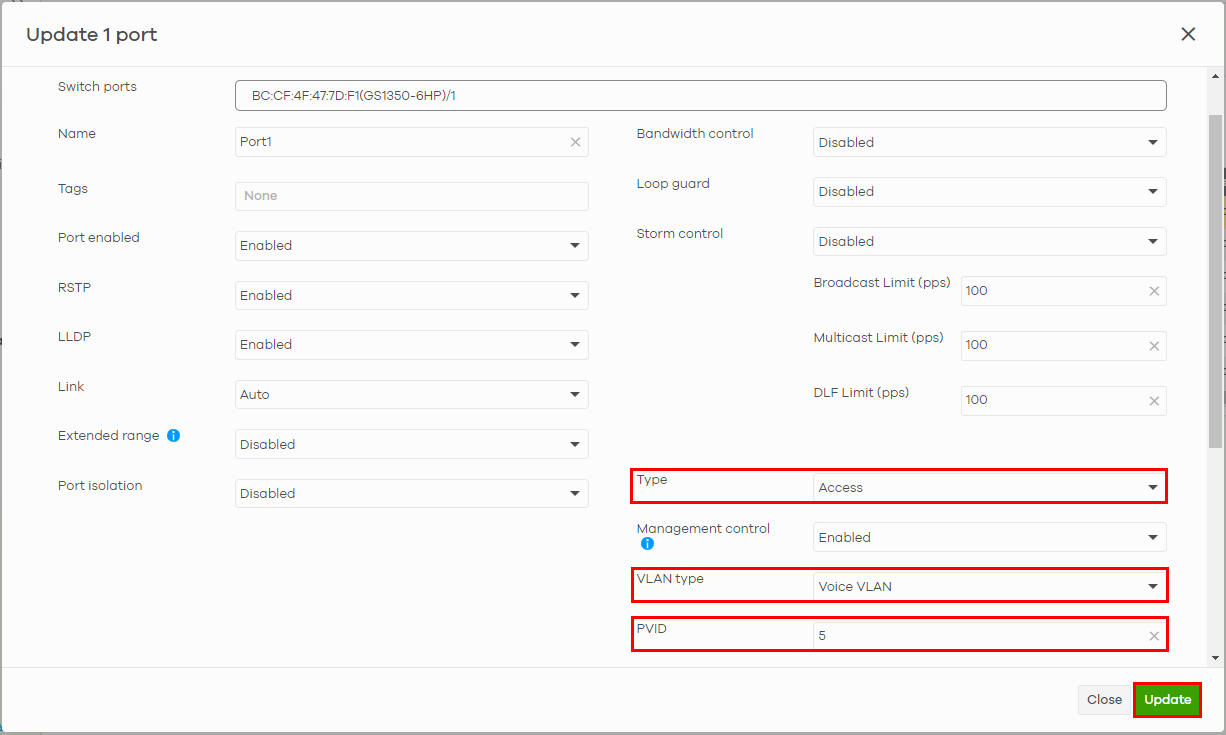
1 Go to Switch > Configure > Switch ports.
2 Select the port that connects to a VoIP device and click Edit.

3 Select Access for the port Type.
4 Select Voice VLAN for the VLAN type.
5 Assign a PVID for the port. Use the PVID to tag data packets with the VLAN ID.
6 Then click Update.
Configure the Voice VLAN
1 Go to Switch > Configure > Switch settings.
2 Scroll to the Voice VLAN part of the screen.
3 Click the switch to enable the voice VLAN feature in the Nebula Device.
4 Enter a Voice VLAN ID.
5 Select the Priority of the voice VLAN from 1 to 6.
6 Select OUI in Assign VLAN by. The Nebula Device assigns the port connected to the VoIP device to the voice VLAN if the connected VoIP device’s OUI matches any OUI in the list.
7 Enter the OUI address of the VoIP device. The OUI (Organizationally Unique Identifier) is the first three octets of the VoIP device’s MAC address. By specifying the MAC address, the Nebula Device can identify voice traffic accordingly.

8 Then click Save.