Manage IPTV (for Nebula Switches only)
This section shows you how to configure IPTV settings and view IPTV reports:
Set up the VLAN for IPTV
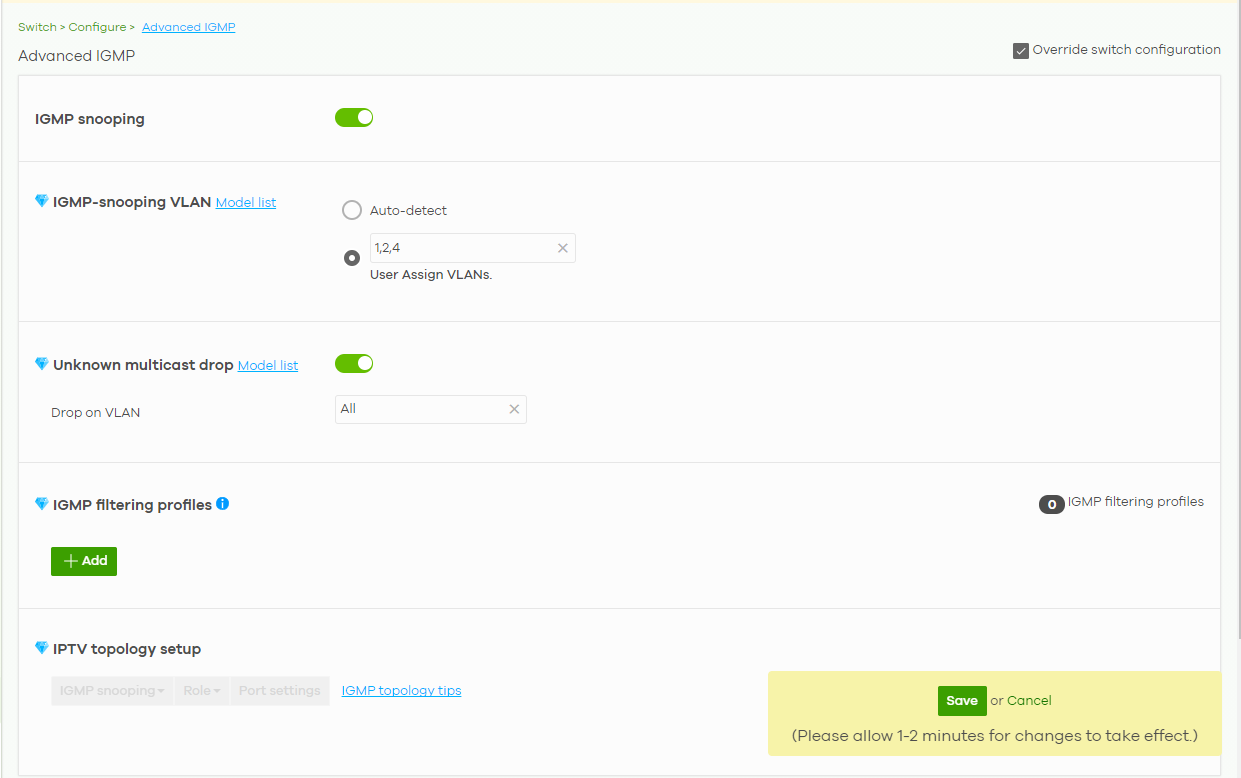
1 Go to the Switch > Configure > Advanced IGMP screen. Click IGMP snooping to enable IGMP snooping on all Switches in the site. Under IGMP-snooping VLAN, select Auto-detect to automatically detect which VLANs are used for IPTV. Otherwise, manually enter the VLAN IDs (1 – 4094, up to 16 VLANs, separated by commas, no spaces) in the User Assign VLANs field. Click Save when you are finished.
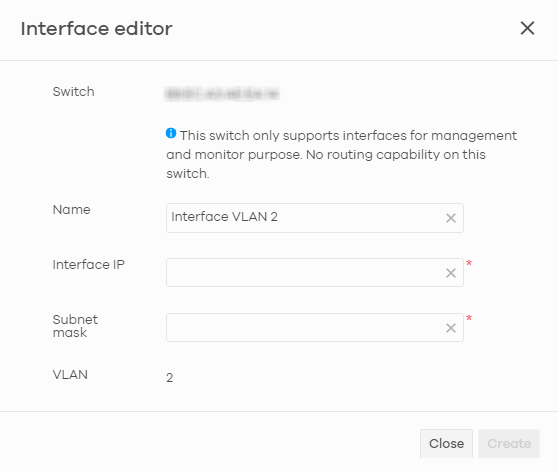
2 If you have not defined the IP address of the Switch, go to the Switch > Configure > IP & Routing screen and click +Add under IP interface. The following screen appear. Enter the Interface IP, Subnet mask and ID number of the VLAN used for IPTV. Click Create to save the setting.
Define the Role of a Switch
1 Go to the Switch > Configure > Advanced IGMP screen. Under IPTV topology setup, select a Switch you want to configure and select a Role to define the role of your Switch from the drop-down list box.

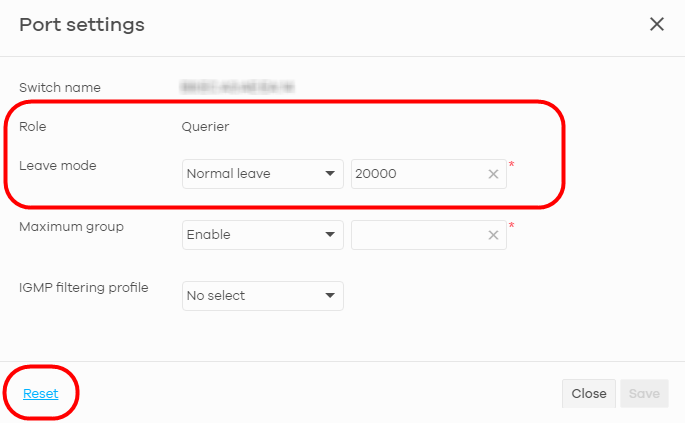
2 After you define the role of the Switch, click Advanced setup and the following screen appears. The Leave mode will show the default setting based on the role you select. But you can still go back to the Advanced IGMP screen to configure the Role and Leave mode. Under Maximum group, you can select Enable and enter the maximum number of channels allowed at a time. Otherwise, select Disable. Click Save to save the changes.
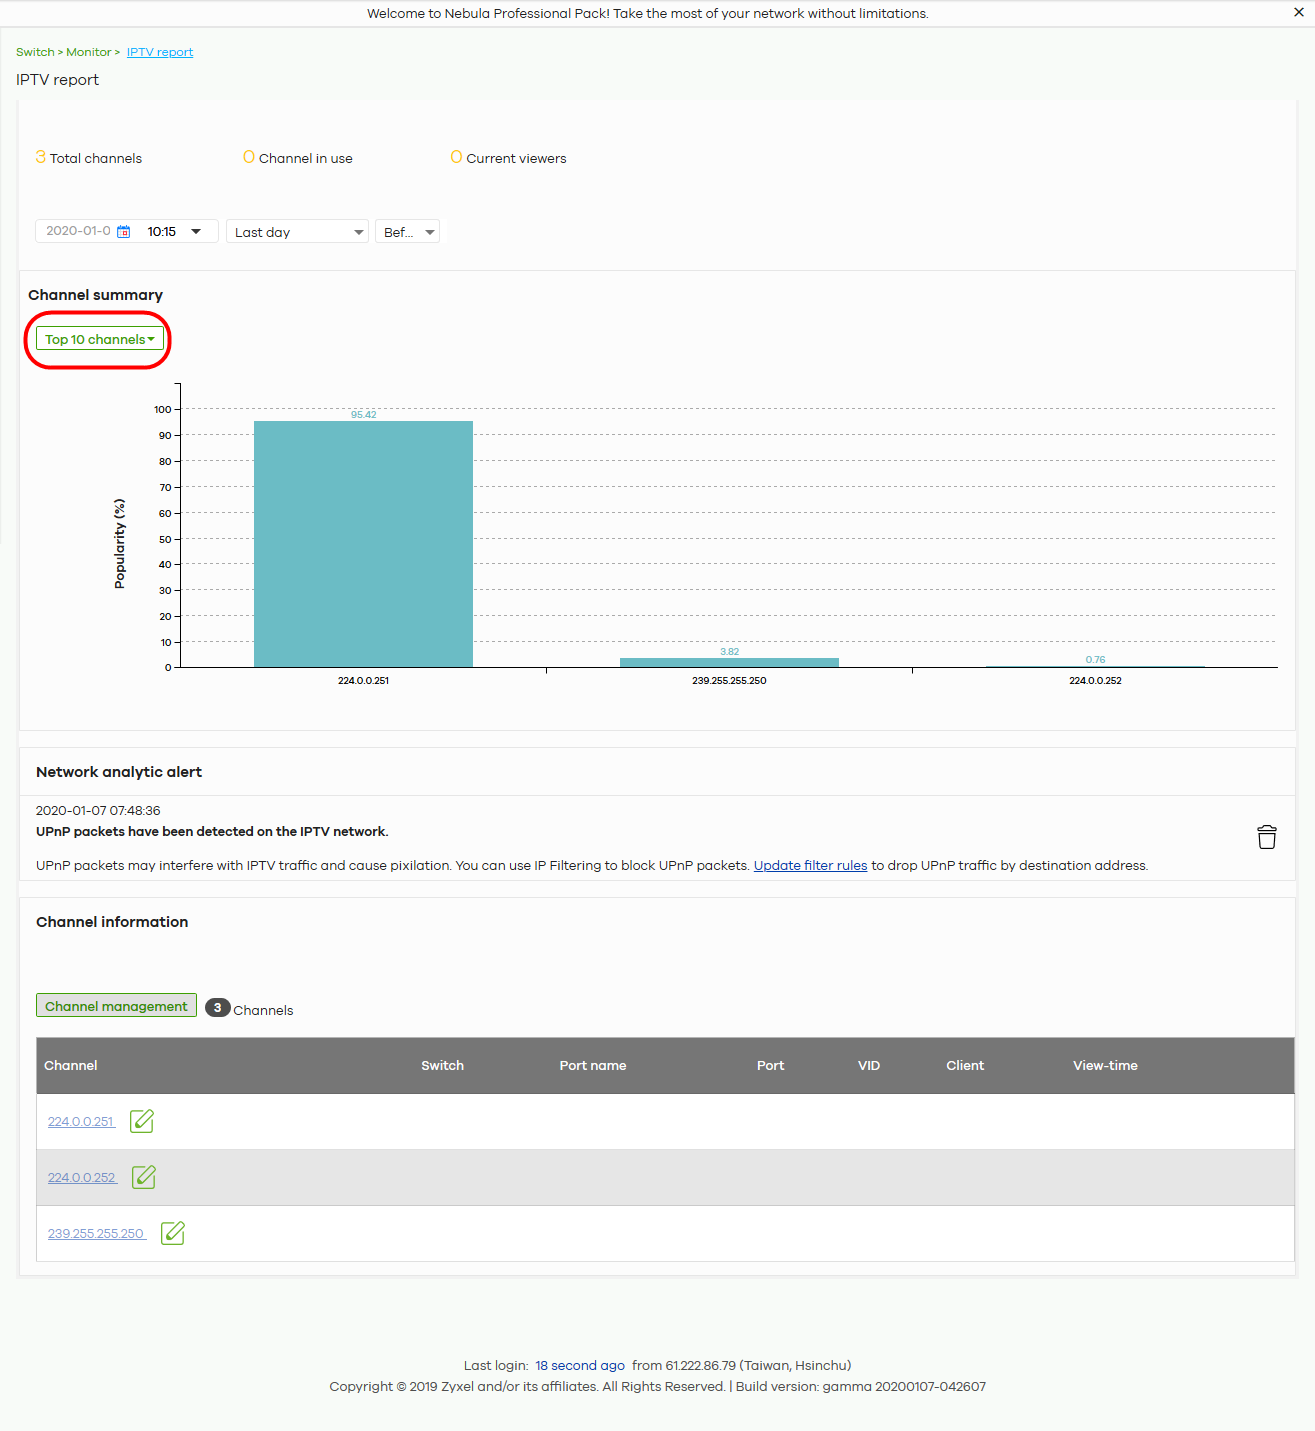
3 If a reminder of Network analytic alert appears on the Switch > Monitor > IPTV report page, click the Update filter rules link below to use the default ACL rules to block UPnP packets. In the example screen below, a Network analytic alert indicates that your IPTV traffic flow is affected by unneeded UPnP packets. Click the Update filter rules link to define IP filtering rules in the Switch > Configure > ACL screen to block these packets.

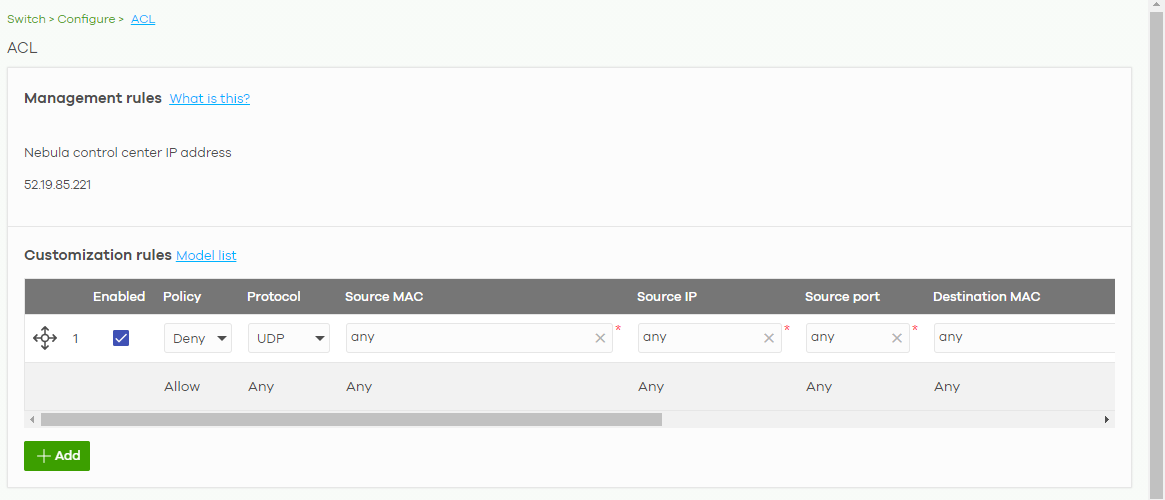
4 The Update filter rules link will lead you to the following screen. Click Save to save the default setting to block UPnP packets.
Configure the Channel Profile and Naming
A channel profile is the IP address range allowed to receive IPTV channels. An IPTV channel is used to send video traffic to the IP addresses in the channel profile.
1 To set up a range of available IPTV channels, go to the Switch > Configure > Advanced IGMP screen. Under IGMP filtering profiles, click +Add and the following screen appear. Enter a Profile name and enter the Start IP address and End IP address. Click Save & Back to save the changes.

2 To edit the naming of the IPTV channels, go to the Switch > Monitor > IPTV report screen and click Channel management under Channel information.

3 You can choose to either import an updated channel list (channels.xlsx), or enter/edit each Channel address and Channel name individually.
• Under Channel management, click channel list to download a blank Excel file template, edit accordingly and save it, and then click import to import the complete channel list to Nebula. Or,
• Click +Add to add and then add/edit a Channel address and Channel name at a time.

4 To view the summary of the IPTV report, go to the Switch > Monitor > IPTV report screen. Click Channel summary to see the top or bottom viewed channels within the specified time period you choose.