Enable IP Source Guard (for Nebula Switches only)
IP source guard consists of the following features:
• DHCP snooping. Use this to filter unauthorized DHCP server packets on the network and to build a binding table dynamically.
• ARP inspection. Use this to filter unauthorized ARP packets on the network.
• Static IP bindings. Use this to create static bindings in the binding table.
Binding Table
IP source guard uses a binding table to distinguish between authorized and unauthorized ARP packets in your network. The Nebula Device builds the binding table by snooping DHCP packets (dynamic bindings) and from information provided manually by administrators (static bindings).
DHCP Snooping
The Nebula Device only allows an authorized DHCP server on a trusted port to assign IP addresses. Unauthorized DHCP servers will not be able to assign IP addresses to network clients. When the Nebula Device receives a DHCP server packet from an authorized DHCP server, it inspects the packet and records the DHCP information in a binding table. The binding records are used in ARP inspection to filter unauthorized ARP packets.
ARP Inspection
When the Nebula Device receives an ARP packet, it looks up the appropriate MAC address, VLAN ID, IP address, and port number in the binding table. If there is a binding, the Nebula Device forwards the packet. Otherwise, the Nebula Device discards the packet.
If you want to use dynamic bindings to filter unauthorized ARP packets (typical implementation), you have to enable DHCP snooping before you enable ARP inspection.
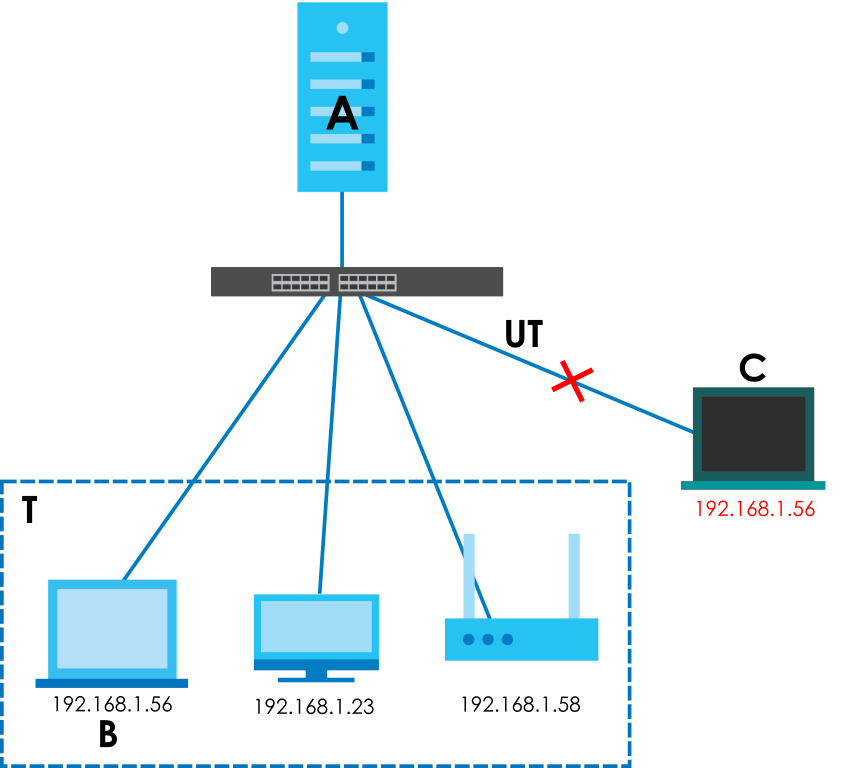
The following figure demonstrates a scenario with DHCP snooping and ARP inspection enabled. In this scenario, we connect an authorized DHCP server (A) and the client devices on the ARP trusted ports (T). A client device (B) is assigned the IP address 192.168.1.56 by the authorized DHCP server (A). A malicious host (C) on an untrusted port (UT) puts a wrong MAC address with the IP address 192.168.1.56 in an ARP reply packet pretending to be client device (B) (192.168.1.56). The Nebula Device snoops DHCP packets sent from the authorized DHCP server (A) and creates bindings in the binding table. When the Nebula Device receives ARP packets from an untrusted port (UT), it compares the IP and MAC addresses with the existing bindings. Since the IP and MAC binding is different from the existing bindings, the Nebula Device blocks the unauthorized ARP packets sent from the malicious host (C). The malicious host (C) therefore cannot disguise as client device (B) to build connections with other client devices on your network.

To setup IP source guard on the Nebula, do the following:
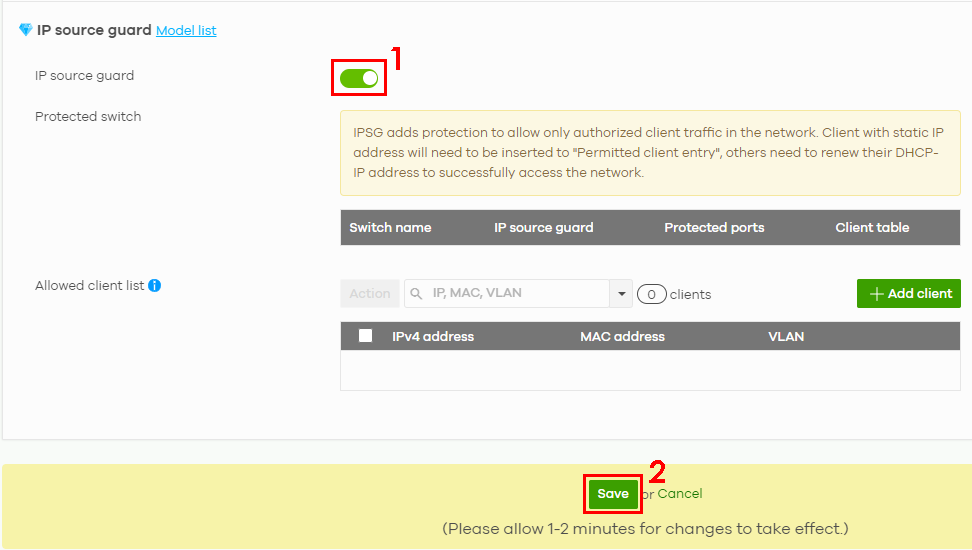
1 Go to Site-wide > Configure > Switches > Switch settings. Slide the switch to enable IP source guard for the Nebula Devices in your site. Then click Save. The Protected switch and Allowed client list will appear. The Protected switch information synchronizes with the port’s IPSG Protected setting in Site-wide > Configure > Switches > Switch ports. It will display the enabled ports.

2 Click the IP Source Guard switch to enable/disable IP source guard for the specific registered Nebula Device(s) in your site.

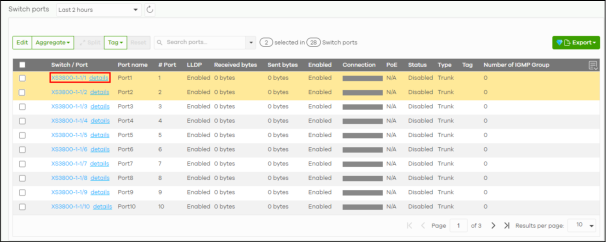
3 Click the edit icon to go to Site-wide > Configure > Switches > Switch ports to configure Protected ports for the Nebula Device. A port is protected if IPSG protected is enabled on this port.
4 Click to select the port you want to enable IP source guard.

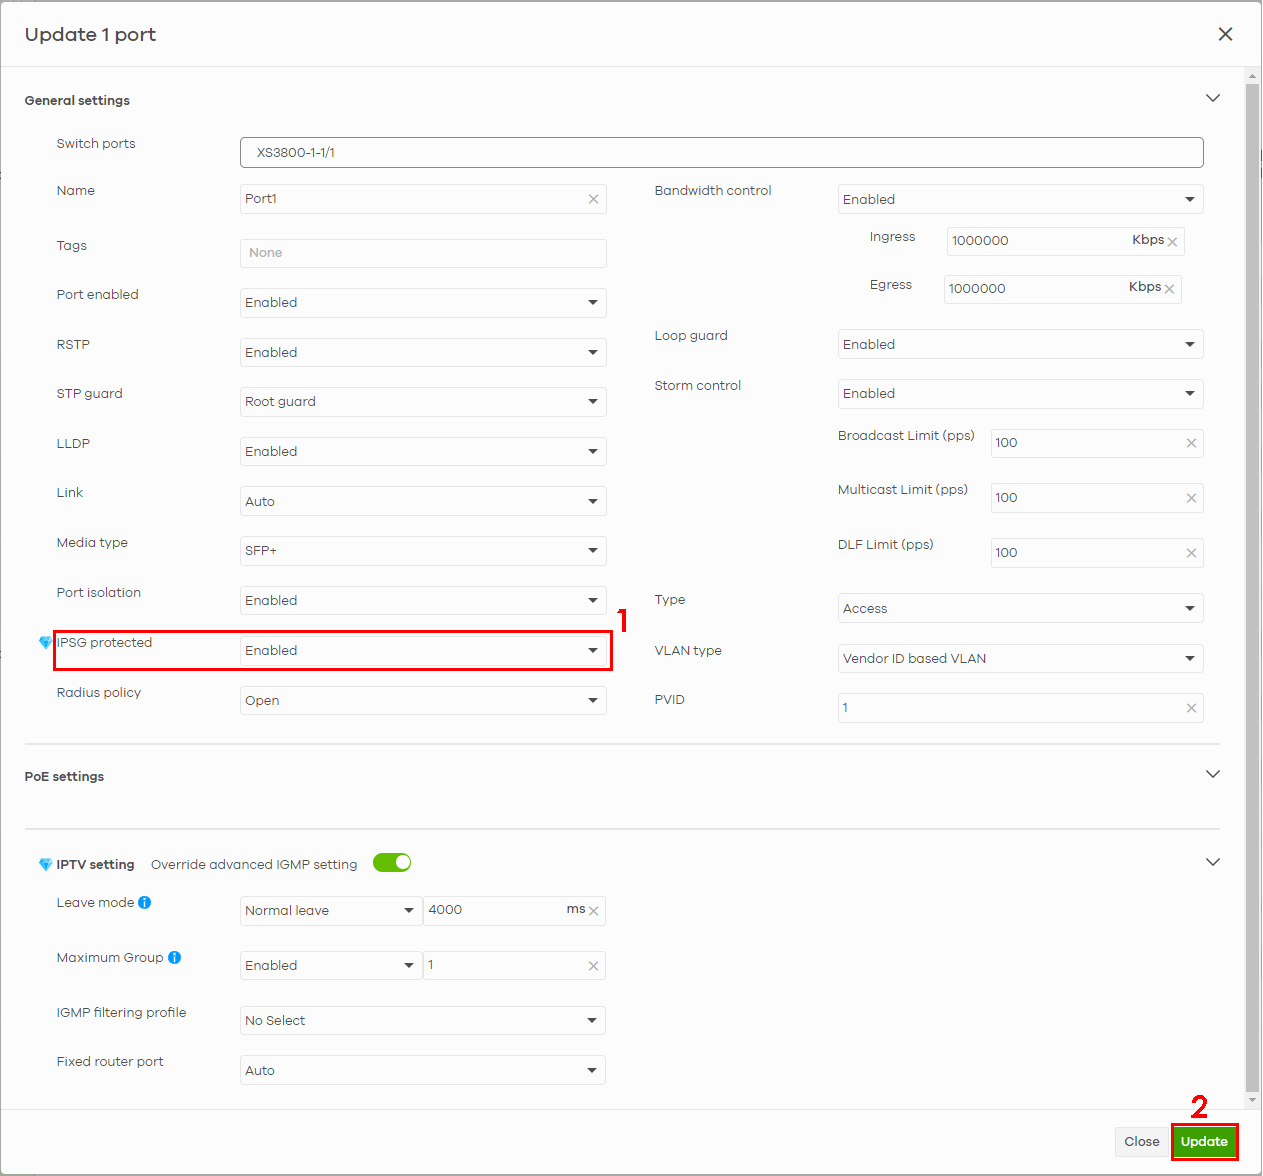
To restore connection on an uplink port, go to Site-wide > Configure > Switches > Switch ports to select the uplink port. In the Update 1 port screen select Disabled in IPSG protected. Then reset the Nebula Device to its factory-default setting (see the Nebula Device’s User’s Guide for more information).
5 In the Update port screen, select Enabled in IPSG protected. The IPSG protected field in the Site-wide > Configure > Switches > Switch ports table for the updated port will display Enabled.

6 Click Run.
7 A merged list window appears. Click to select the port and then click Transfer.

8 The port with the particular IP and MAC addresses is added to the Allowed client list. Click Save.
