Configure Guest Isolation on your WiFi Network
To enhance security for both host network and guest users, configure guest isolation on your WiFi network. This prevents the guest users from seeing each other on your WiFi network.
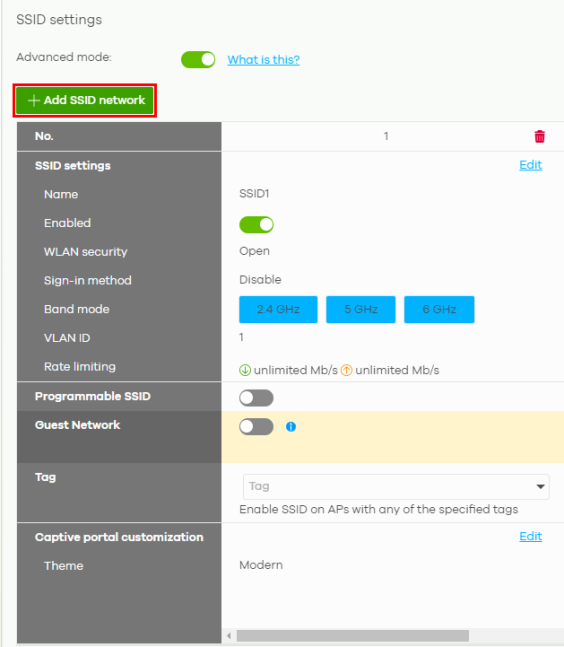
1 Go to Site-wide > Configure > Access points > SSID settings and click + Add SSID network.
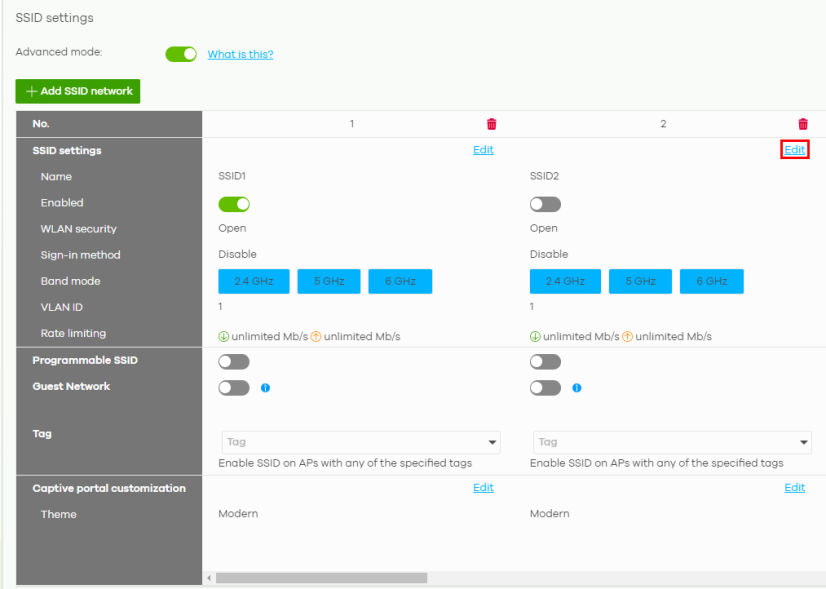
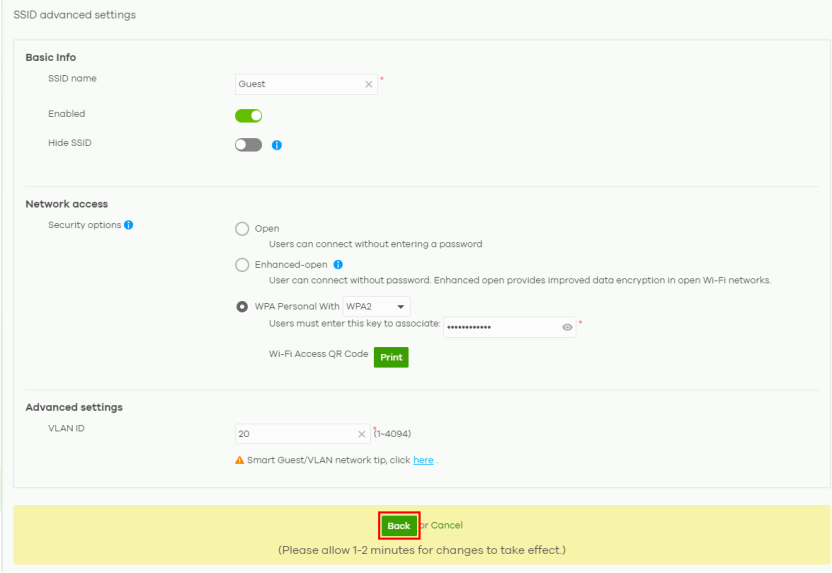
2 Click Edit on SSID2 to go to the Site-wide > Configure > Access points > SSID advanced settings screen.
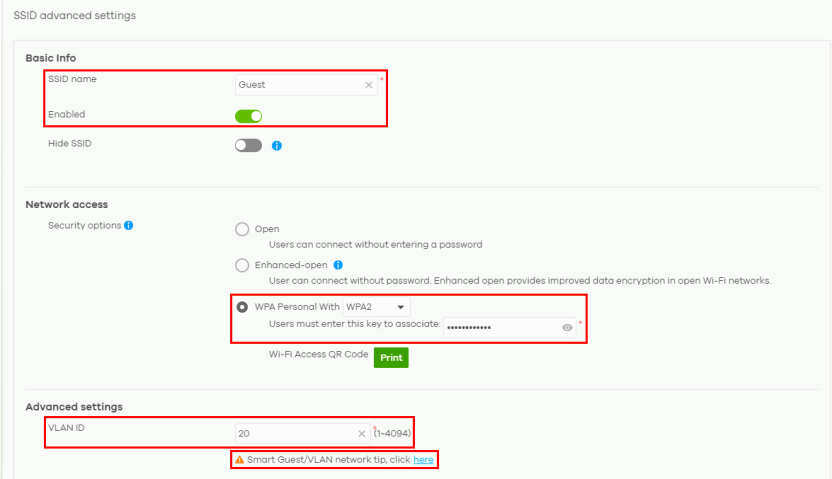
3 Enter a name for this WiFi network for identification purposes (for example, Guest). Click Enabled to turn on this WiFi network. Select WPA Personal With (WPA2) and enter a pre-shared key from 8 to 63 case-sensitive keyboard characters in Users must enter this key to associate to enable WPA2-PSK data encryption. Enter the ID number of the VLAN to which the SSID belongs (for example, 20).
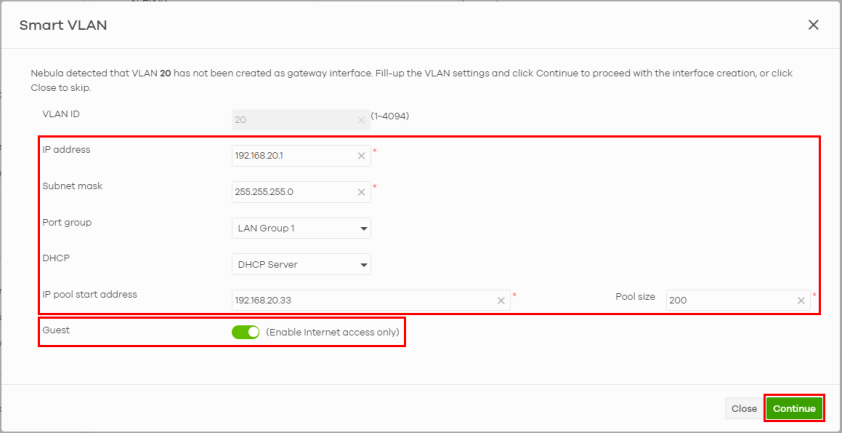
4 On the Smart VLAN screen:
• Enter the IP address and Subnet mask, and select the Port group to which the Security Firewall interface belongs. Go to Site-wide > Configure > Firewall > Interface to get the Port group information.
• In DHCP, select DHCP Server to allow the Nebula Device to assign IP addresses and provide subnet mask, gateway, and DNS server information to the network.
• In IP pool start address, enter the IP address from which the Nebula Device begins allocating IP addresses.
• In Pool size, enter the number of IP addresses to allocate. For example, 200. This number must be at least one and is limited by the interface’s Subnet mask. If the Subnet mask is 255.255.255.0 and the IP pool start address is 192.168.20.33, the Nebula Device can allocate 192.168.20.33 to 192.168.20.232, or 200 IP addresses.
• Click the Guest switch to the right to configure the interface as a Guest interface. Client devices connected to a Guest interface have Internet access but cannot communicate with each other directly or access networks behind the Nebula Device.
Then click Continue to save your settings for the VLAN to the NCC and return to the Site-wide > Configure > Access points > SSID advanced settings screen.
5 Click Back to save your settings for the Guest SSID to the NCC and return to the Site-wide > Configure > Access points > SSID settings screen.
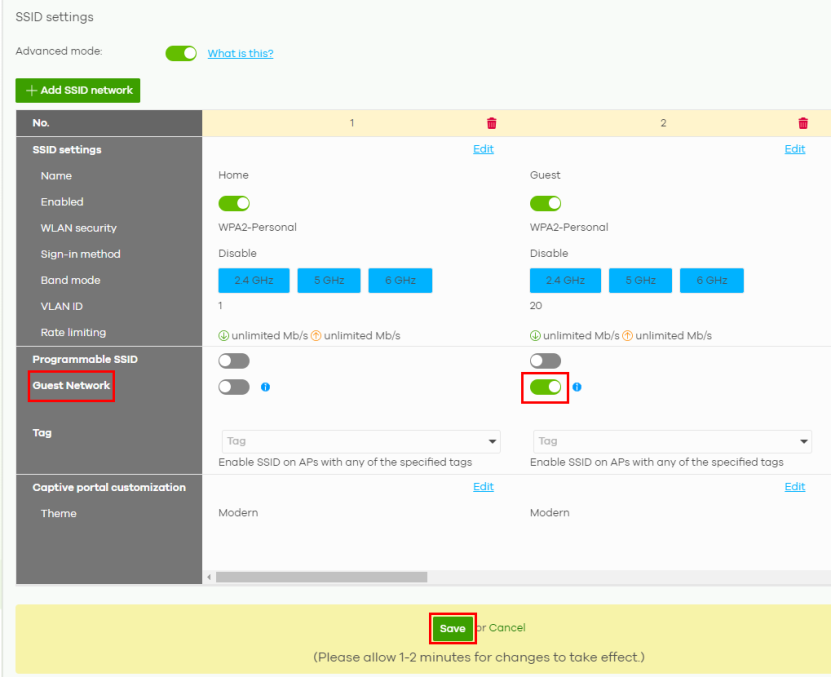
6 Activate the Guest Network for the Guest SSID and click Save.
To test the configuration:
1 Connect a WiFi client to the Guest SSID. The WiFi client should get an IP address from the Guest SSID.
2 Have the Guest WiFi client access the www.zyxel.com website to test Internet connectivity.
3 Then, have the WiFi client connected to the Guest SSID ping another WiFi client connected to the Home SSID. The ping attempt should fail as the WiFi client connected to the Guest SSID can only access the Internet.