Remote Access VPN Setup
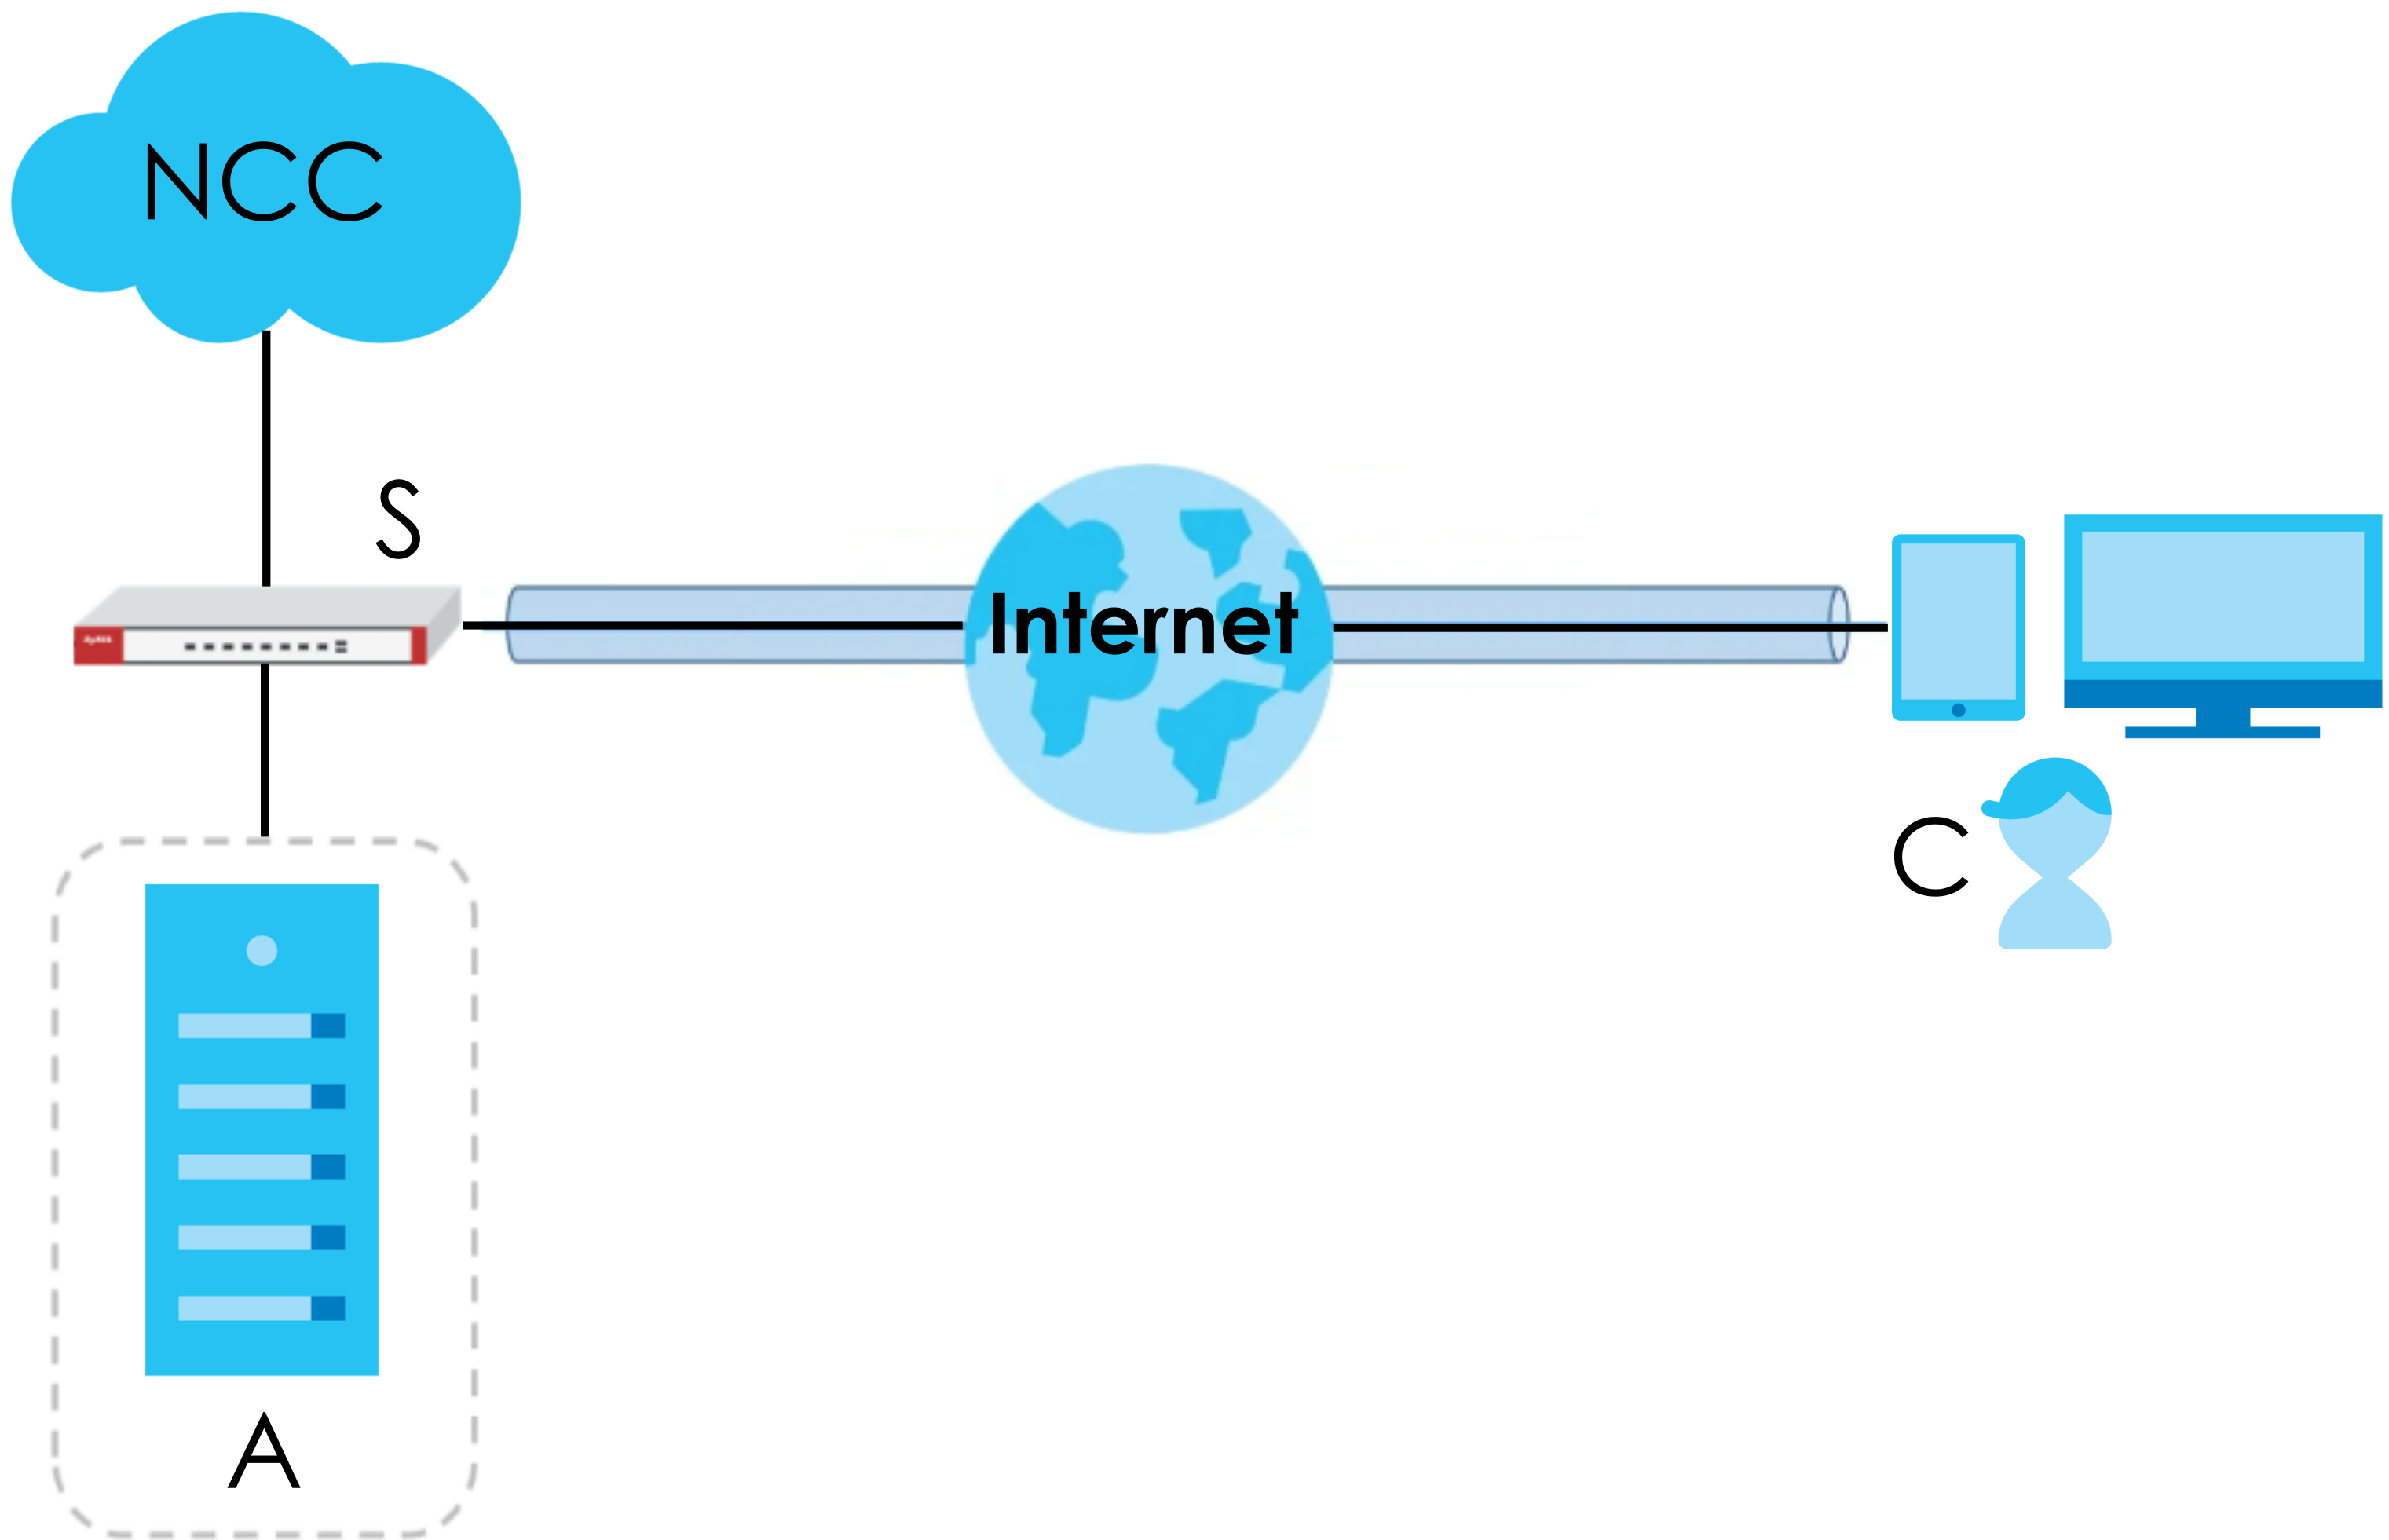
The following figure illustrates a secure VPN channel configured through Nebula. The VPN client (C) remotely accesses the office server (A) through the Nebula Device (S) in a typical work from home scenario.
To set up a remote access VPN on Nebula, do the following:
• Create a VPN user
• Enable the remote access VPN rule for IPSec VPN client
• Check the connection in Nebula.
The user needs to do the following:
• Set up the VPN using Zyxel’s SecuExtender (only), a VPN client software
• Import the VPN configuration file
• Open the VPN tunnel
• Set up two Factor Authentication on a mobile device to bind the user account.
Create a VPN User
1 Go to the Site-wide > Configure > Cloud authentication screen. Click +Add to create a user.

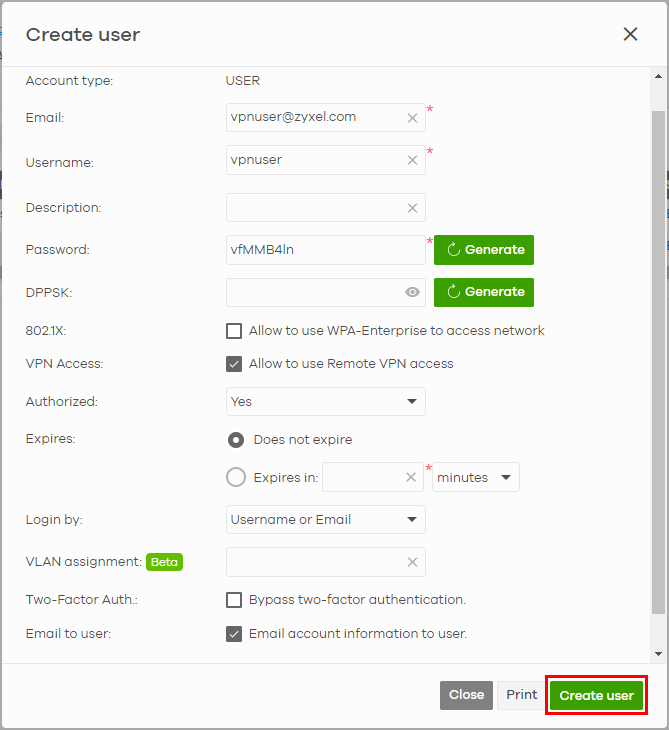
2 Enter an Email, Username, generate or enter a Password (4 – 31 characters, including 0–9 a–z A–Z `~!@#$%&*(_+-={}|[];'"./<> ?). Click Allow to use Remote VPN access. Click Does not expire to set no time limit for this user account. Select Username or Email in Login by. Click to select Email account information to user. Then click Create user.
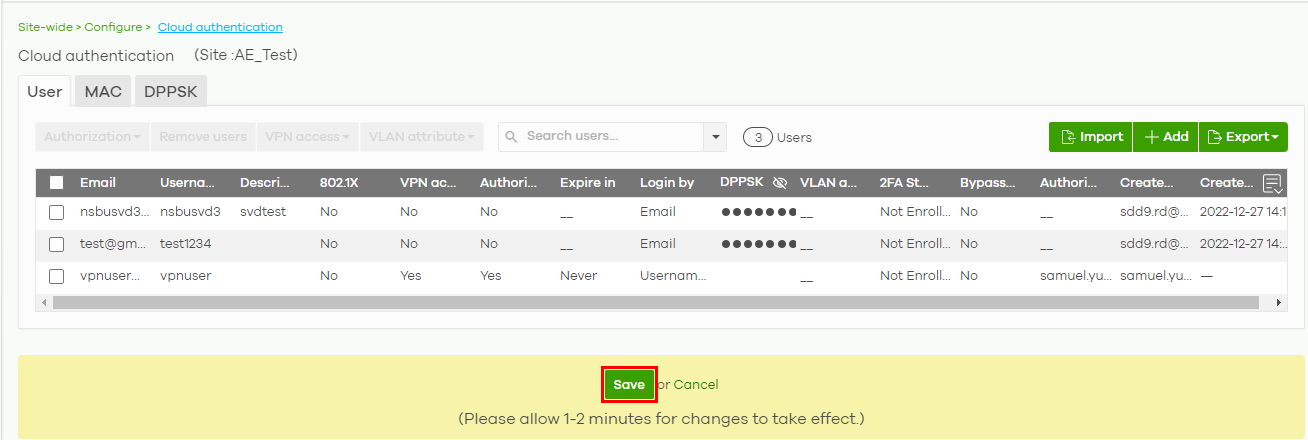
3 Click Save.
Enable the Remote Access VPN Rule for IPSec VPN Client
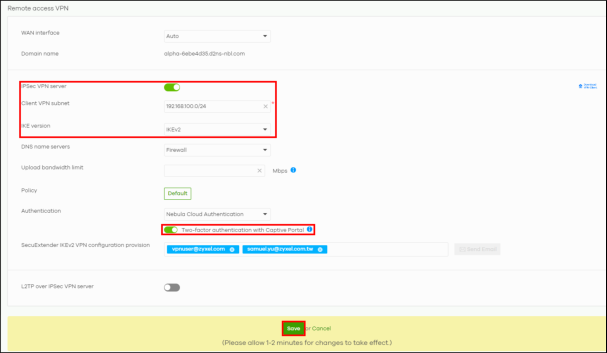
1 Go to the Site-wide > Configure > Firewall > Remote access VPN screen. Click IPSec VPN server to enable VPN. Enter the IP address range in Client VPN subnet. Select IKEv2 in IKE version.
Click Two-factor authentication with Captive Portal to enable two-factor authentication with the Google authenticator app. The VPN client will be asked to provide a Google authenticator verification code, so must install the Google Authenticator app. Then click Save.
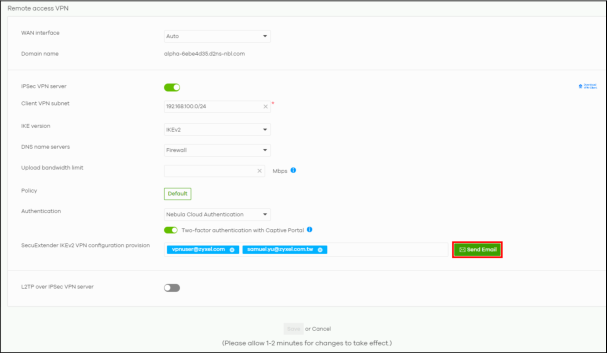
2 Click Send Email to give your VPN client the configuration instructions through email.
VPN Setup by the VPN Client
1 The VPN client should receive the following emails:
• Configuration for SecuExtender IPSec VPN Client email with attached VPN configuration file (.tgb). Save the configuration file in your computer.
• Nebula Cloud Account Information email with the following login information: Email, Username, Password, and Expired time (validity = NEVER).
2 Click the link in the Configuration for SecuExtender IPSec VPN Client email for instructions on installing the SecuExtender and activating the license key. The How to activate SecuExtender license key after your online purchase webpage appears.
• Click Download.
• Select the SecuExtender app based on your computer’s operating system to install it.
• Follow the online prompts to activate the SecuExtender license.
Import the VPN Configuration File
1 Save the attached VPN configuration file (.tgb) from the Configuration for SecuExtender IPSec VPN Client email on the VPN user’s computer.
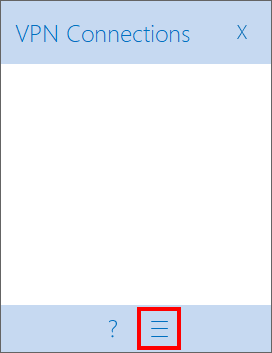
2 On your computer, open SecuExtender. Click the menu icon.
3 Click Configuration > Import.
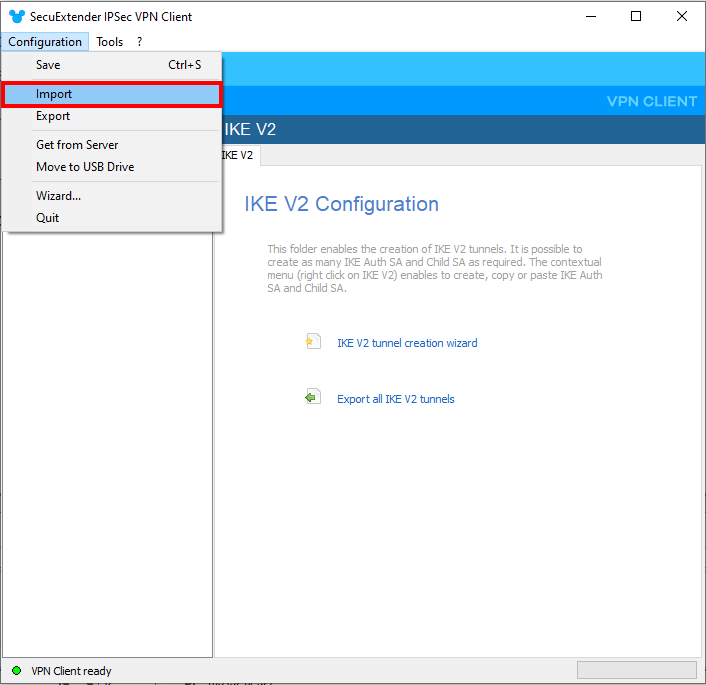
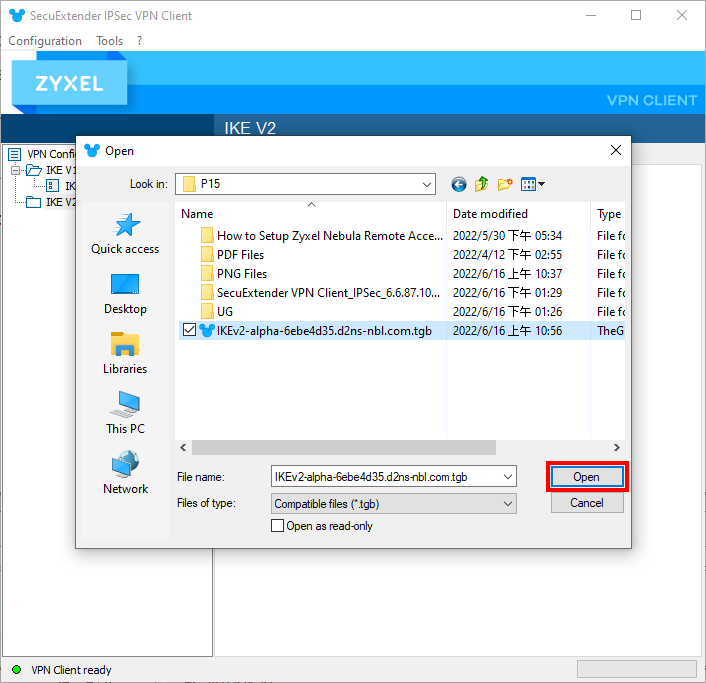
4 Locate in your computer and click Open to import the VPN configuration file from the Configuration for SecuExtender IPSec VPN Client email.
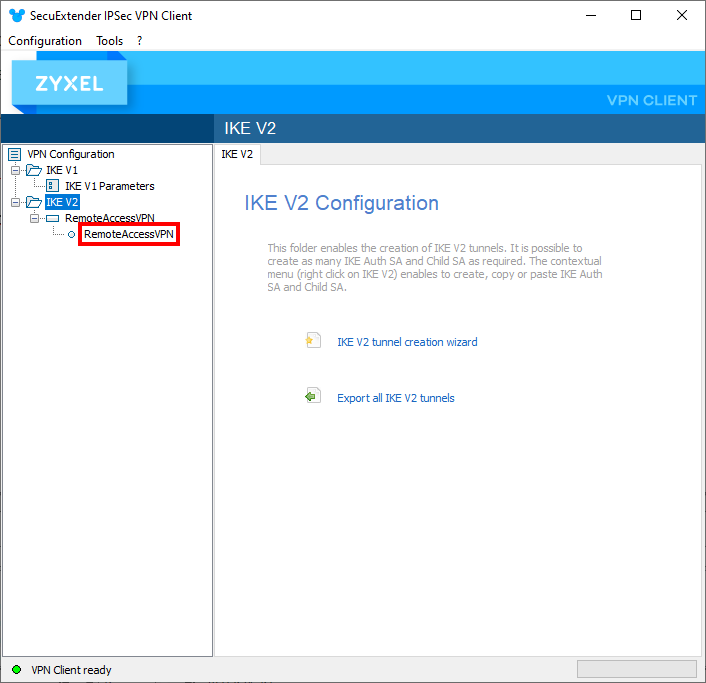
5 Click RemoteAccessVPN in VPN Configuration > IKE V2 > RemoteAccessVPN.
Open the VPN Tunnel
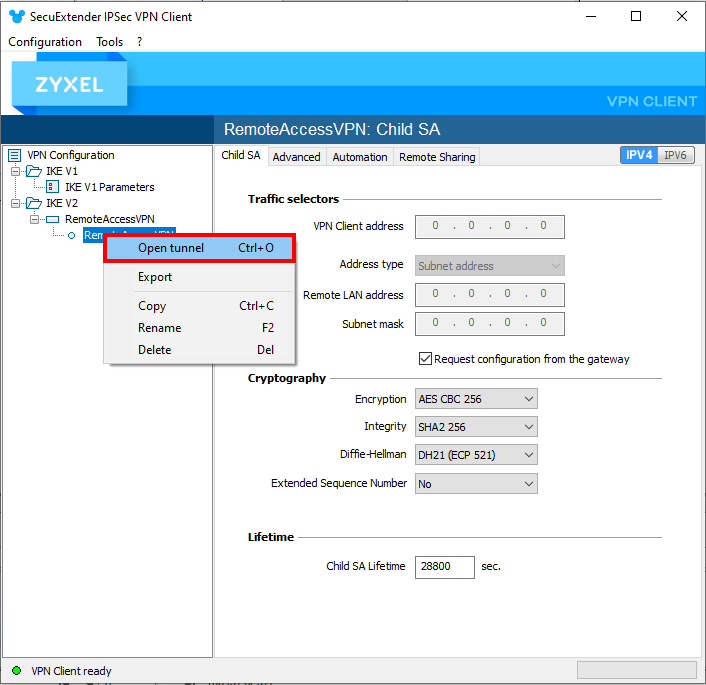
1 Right-click RemoteAccessVPN in VPN Configuration > IKE V2 > RemoteAccessVPN and click Open tunnel.
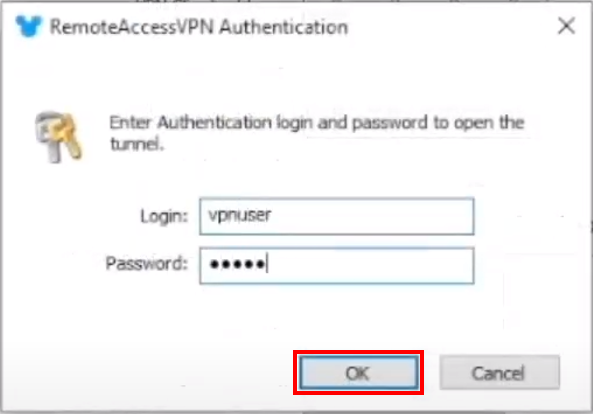
2 On the next screen, enter the Login: Username and Password from the Nebula Cloud Account Information email. Then click OK.
IKEV2 Auth sent will appear on the lower right of the screen.

Wait until Tunnel opened appears on the lower right of the screen.

An IP address will now appear in VPN Client address to replace the previous 0.0.0.0. The button lights green in front of RemoteAccessVPN in VPN Configuration > IKE V2 > RemoteAccessVPN.
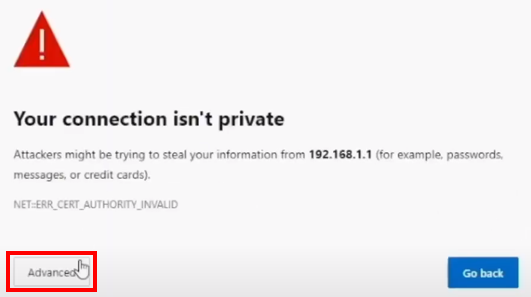
3 When Your connection isn’t private appears on the web browser, click Advanced to continue.
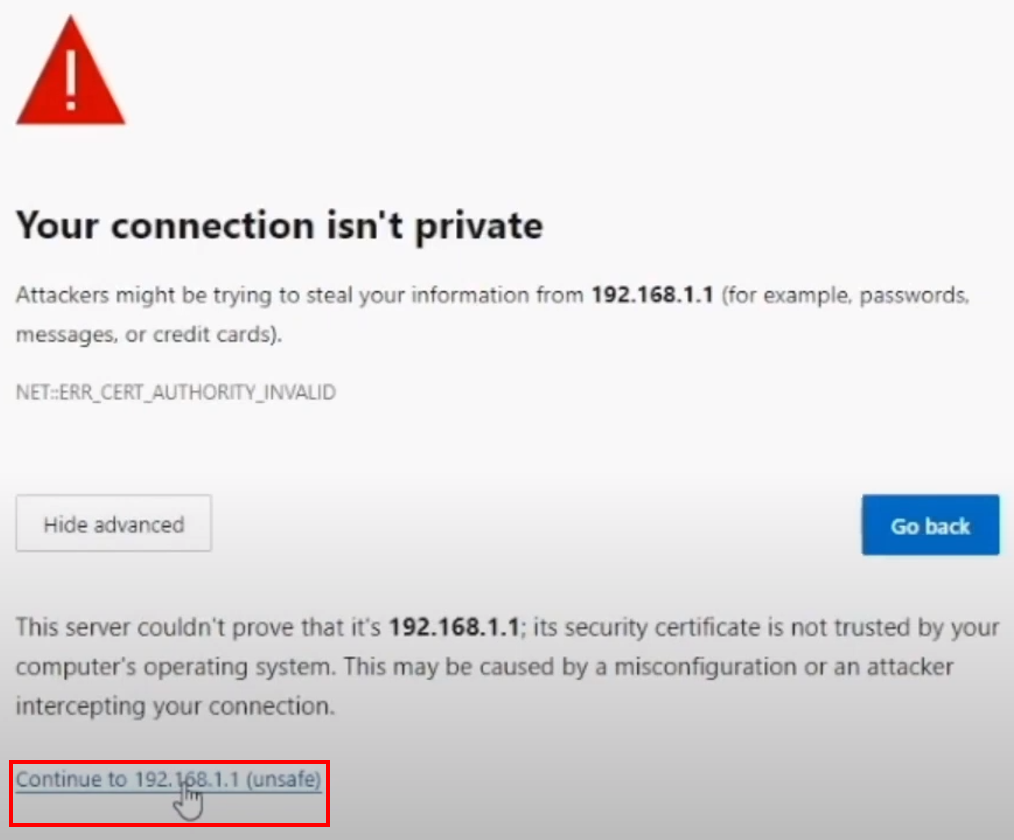
4 Click the Continue to xxx.xxx.x.x (unsafe) link on the bottom of the screen.
Set Up Two Factor Authentication to Bind the User Account
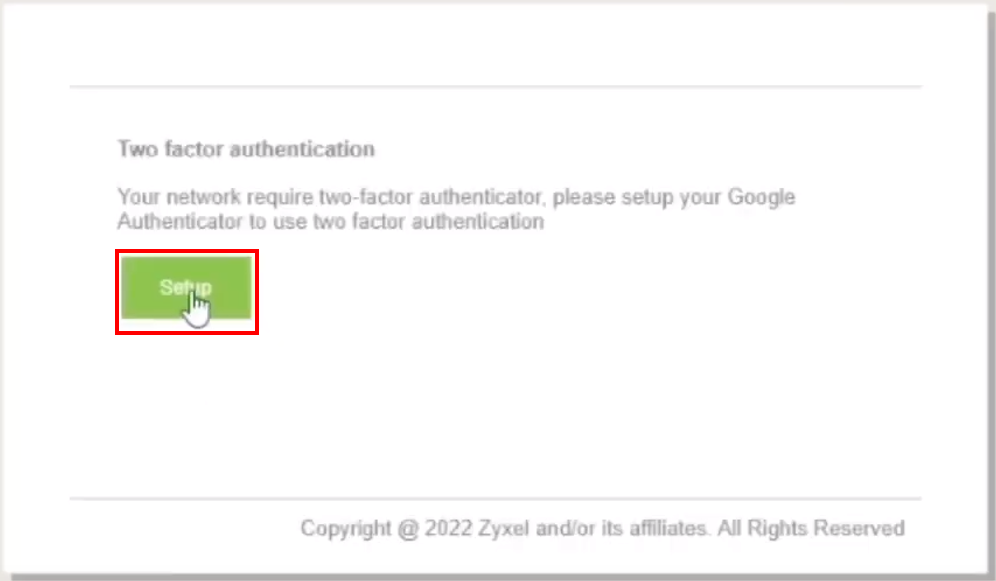
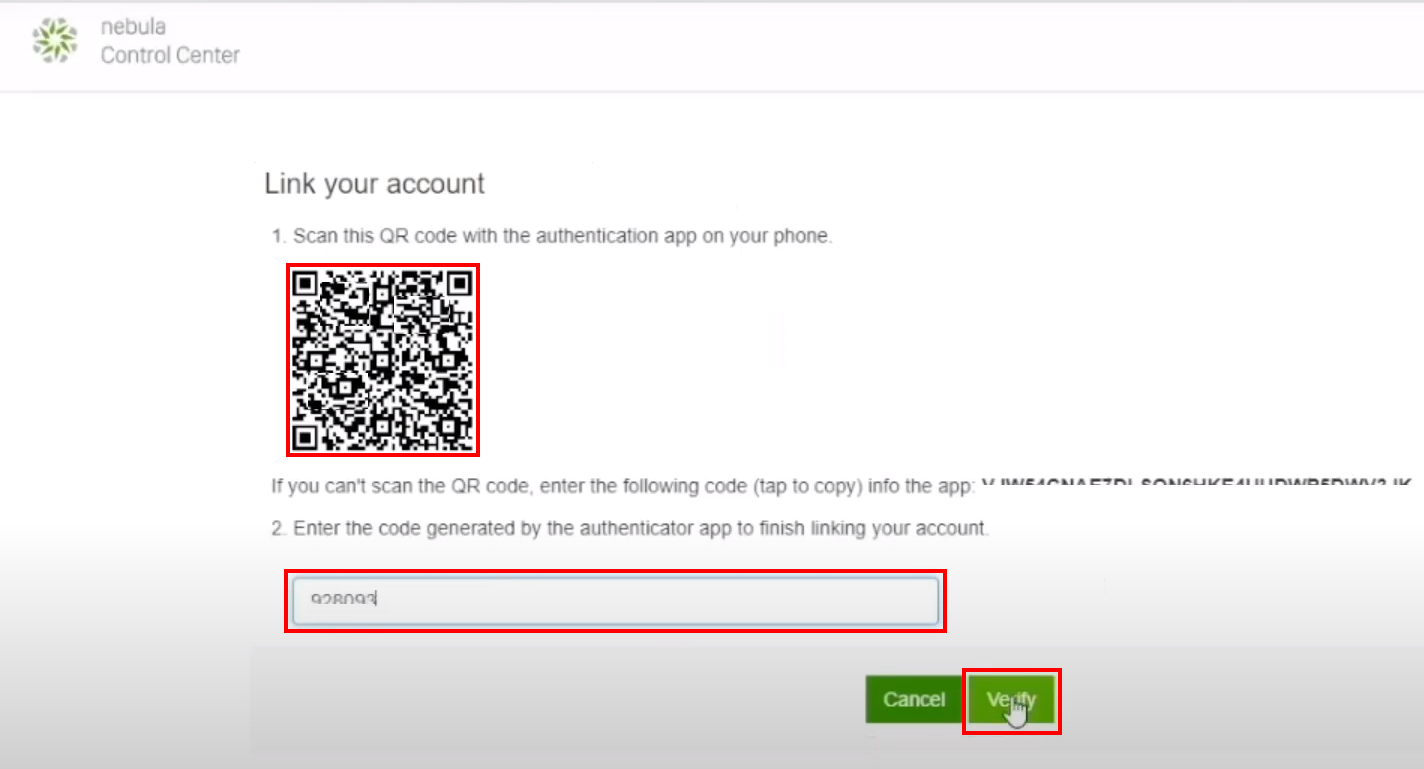
1 On the Two factor authentication screen, click Setup.
The prompt to download and install the Google Authenticator app on a mobile device appears. Install the Google Authenticator app. Then click Next.
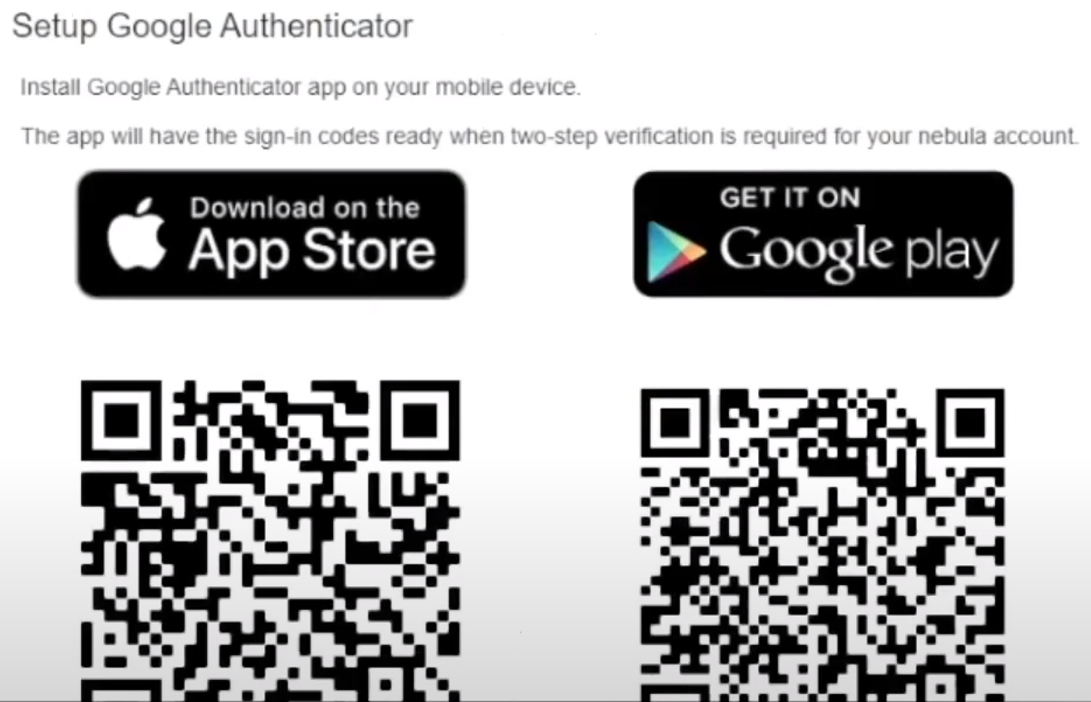
2 Use the Google Authenticator app to scan the QR code. The QR code contains the user account information created in step 2 of Create a VPN User. Enter the code. Then click Verify.
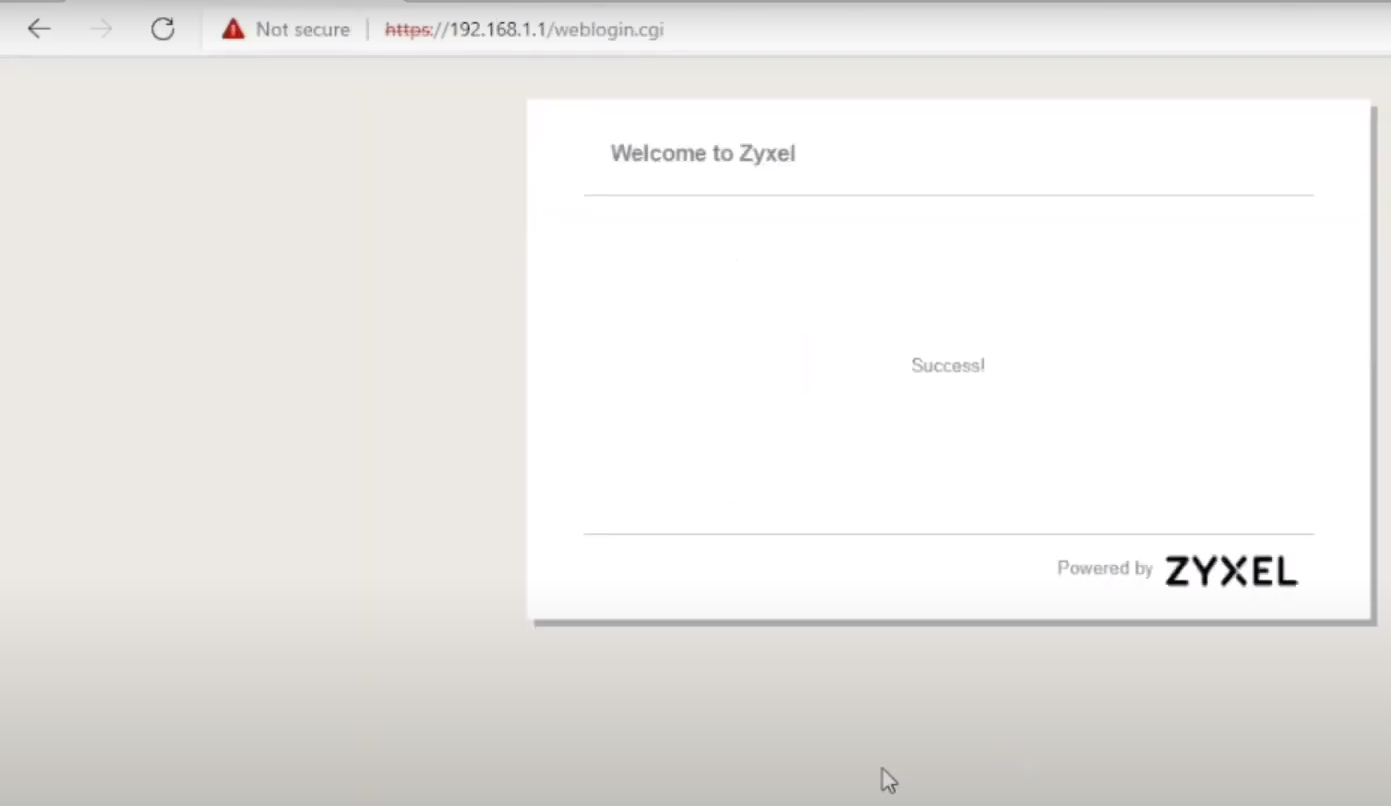
The following screen will appear in the user’s web browser.
Check the Connection in Nebula by the Administrator
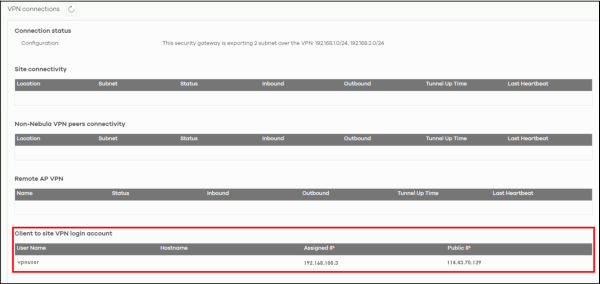
Go to the Site-wide > Monitor > Firewall > VPN connections screen. The remote VPN connection should appear in Client to site VPN login account table.
