Configure a Captive Portal
A captive portal is a login web page where a network user has to be authenticated before they can access the network.
This tutorial shows you how to configure captive portal settings for an SSID profile.
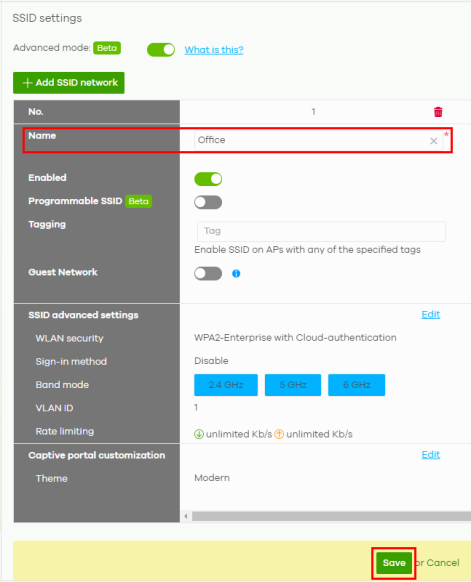
1 Go to Site-wide > Configure > SSID settings and enter the SSID Name. See Alert Settings for more information on configuring this screen. Then click Save.
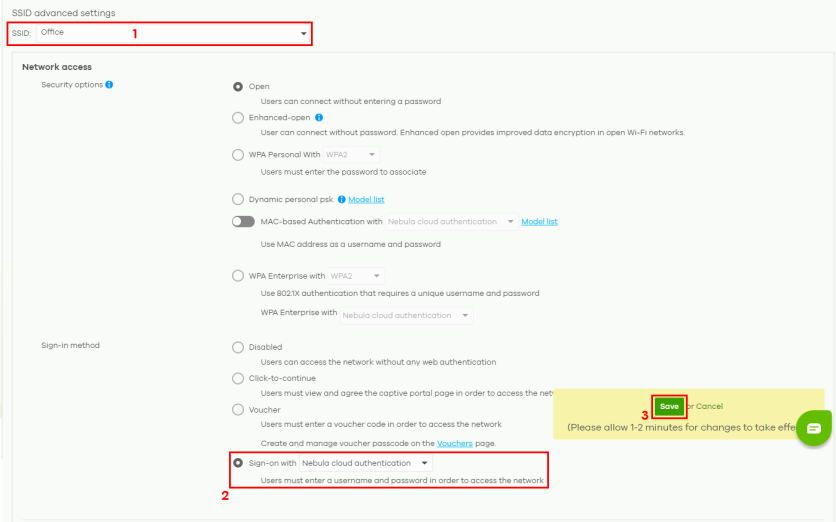
2 Go to Site-wide > Configure > Access points > SSID advanced settings and select the SSID Name: Office. Select the Sign-on with: Nebula cloud authentication to use the NCC user database to authenticate users. Then click Save.
Alternatively, select My RADIUS server to use a RADIUS server that will authenticate users. See SSID Advanced Settings for more information on configuring this screen.
If you select My RADIUS server in step 2, enter the RADIUS server’s Host, Port, and Secret. Enter the Network Access Server (NAS) identifier on the Nebula Device to identify the Nebula Device to the RADIUS server, if required. This might be necessary if there are multiple Nebula Devices behind NAT using the same public WAN IP address for the RADIUS server. Then click Save.
