Setup Wizard
Setup Wizard
• The setup wizard helps you create an organization and site, add Nebula Devices, upgrade your Nebula Device firmware, and set up WiFi networks quickly.
• The wizard appears automatically after you log in the first time or if there is no organization created under your account.
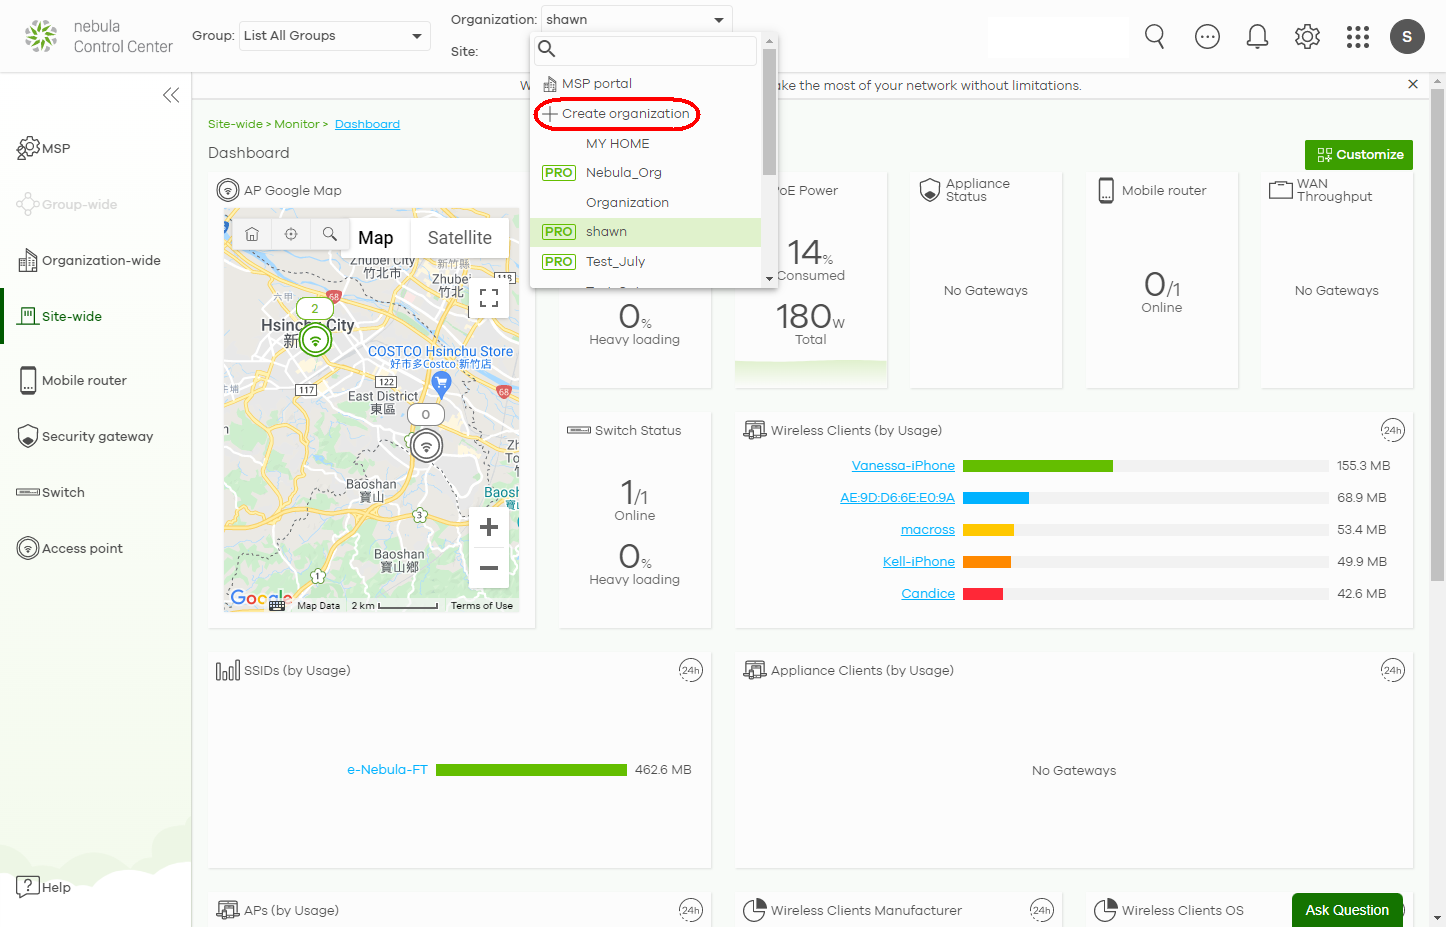
• The wizard also starts when you click Create Organization from the Organization drop-down list box in the title bar.
Step1: Run the Wizard
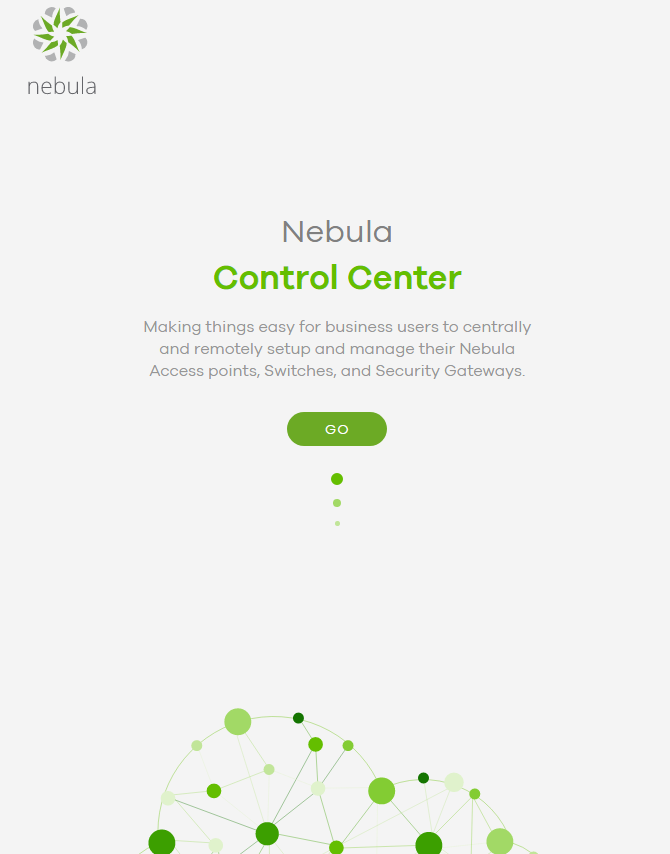
1 After logging in to https://nebula.zyxel.com, the following screen appears. Click GO to start the NCC wizard.
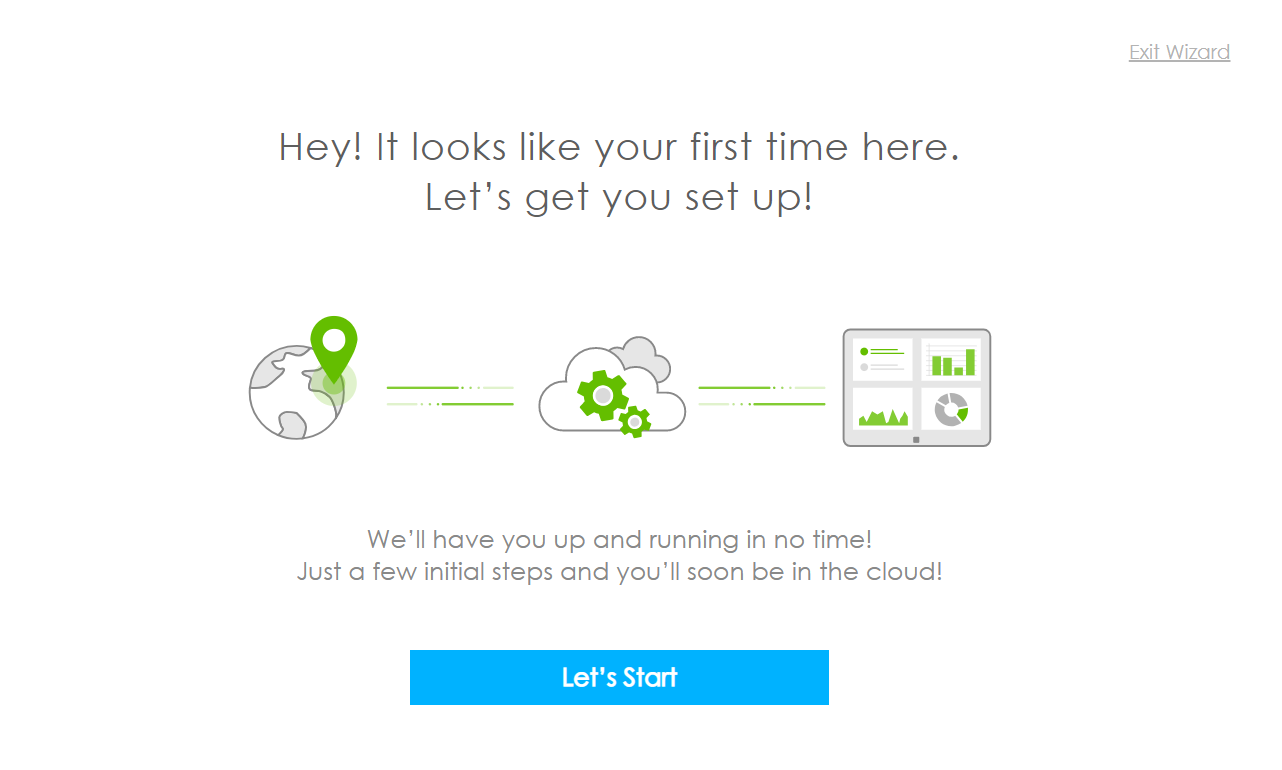
2 The welcome screen displays when you are creating the first organization under your account. Click Let’s Start to begin.
Step 2: Create an Organization and Site
1 Enter a descriptive name for your organization and site. Both names must consist of 1 – 64 characters.
2 Select the time zone of your location. This will set the time difference between your time zone and Coordinated Universal Time (UTC).
3 Click Next to continue.

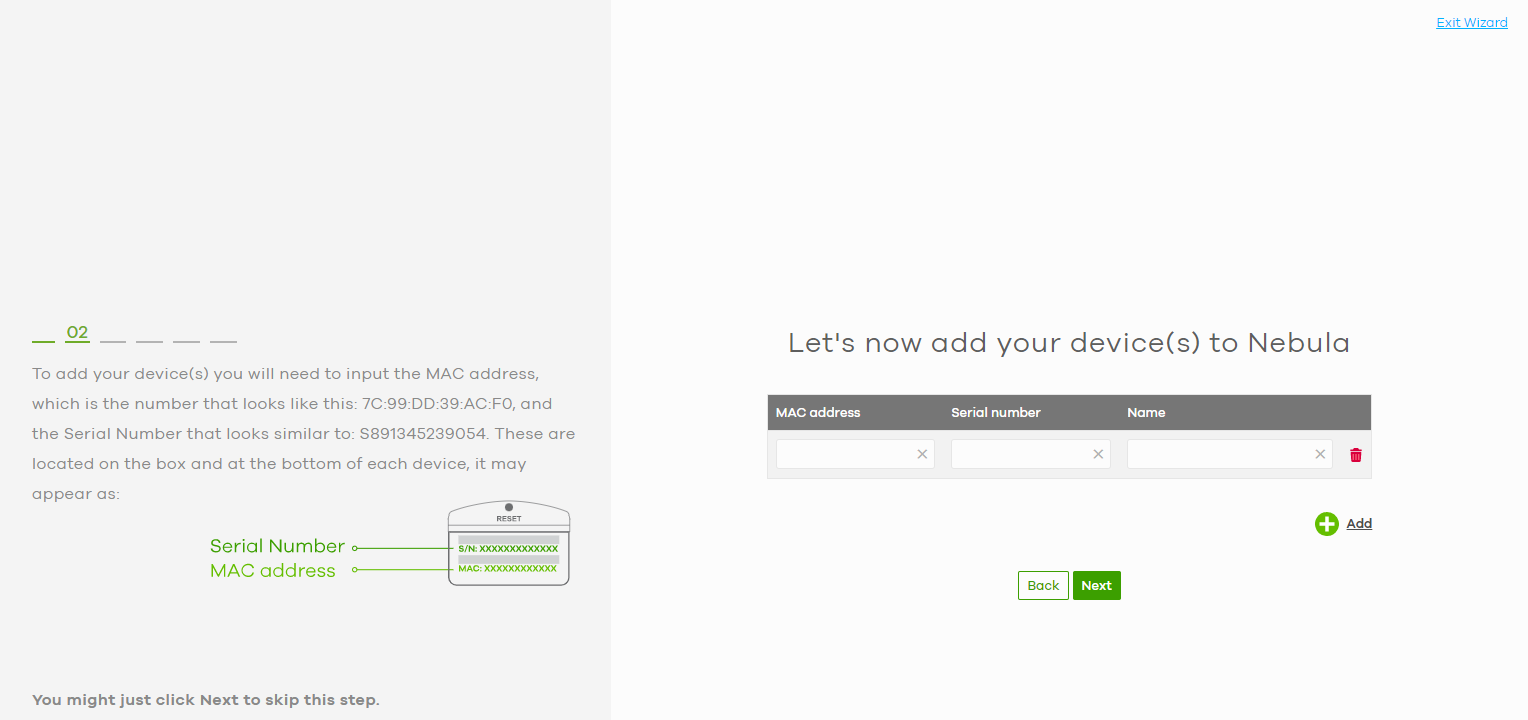
Step 3: Add Your Nebula Devices
1 Enter your device’s MAC address and serial number.
You can also leave the fields blank and click Next to move on to the next step without adding a Nebula Device.
2 Click the + Add button to register and add the Nebula Device to the site. You can register multiple Nebula Devices at a time.
3 Click Next to proceed.
Step 4: Upgrade your Nebula Device Firmware
You should always use the most recent firmware to get the latest features, improvements, and bug fixes by clicking Yes (default setting).
Even if you choose not to upgrade the firmware, NCC will still perform a mandatory upgrade to Stable firmware version if the Nebula Device’s firmware have security vulnerabilities, and/or lack key performance improvements. See Organization-Wide > Configure > Firmware management > Devices for the description of a Stable firmware.
The following table shows when a mandatory firmware upgrade occurs for the different Nebula Device types.
Nebula Device type | mandatory firmware upgrade time |
|---|---|
Access Points | The mandatory firmware upgrade occurs when the Nebula Device is online with NCC. |
Switches / Firewalls / Security Gateways | The mandatory firmware upgrade occurs after registering the Nebula Device on NCC. |
Click Next to proceed.

Step 5: Set up your WiFi Network
1 Configure the WiFi settings for the managed APs. Enter the WiFi network name (SSID) and the WiFi password.
You can also leave the fields blank and click Next to move on to the next step without setting up the main WiFi network.
2 Configure the ID number of the VLAN to which the SSID belongs.
The VLAN ID 1 is generated automatically by the NCC and reserved for a gateway’s LAN 1 and LAN 2 by default. The IPv4 subnets 192.168.1.0/24 and 192.168.2.0/24 are also reserved for these two LAN interfaces.
If you enter a different VLAN ID other than the default one (“1”) in the VLAN field, click the Set up VLAN interface link to create a gateway interface with the specified VLAN ID. You need to configure an IPv4 address and subnet mask and enable the DHCP server function for this interface.
3 Click Next to proceed.

Step 6: Set up a Guest WiFi Network
1 Configure WiFi and VLAN settings for guest users who can wirelessly access the Internet or networks through Nebula Devices.
You can also leave the fields blank and click Next to move on to the next step without setting up the guest WiFi network.
2 If you want to enable web authentication, select Clicking “Agree” to access the network to block network traffic until a client agrees to the policy of user agreement. Otherwise, select Using their Facebook account to join the network to block network traffic until the client logs in using his/her existing Facebook account.
If you enter a different VLAN ID other than the default one (“1”) in the VLAN field, click the Set up VLAN interface link to create a gateway interface with the specified VLAN ID. You can set the gateway interface as a guest interface, configure the IPv4 address and subnet mask and enable the DHCP server function for this interface.
3 Click Next to proceed.

Step 7: Set up the Deployment Method
If you added a ZyWALL USG FLEX / ATP / USG20(W)-VPN Series device in step 3, you need to select a deployment method for management by Nebula. Select Nebula native mode if available. If not, select Zero Touch Provision mode and configure an email address to send an activation link to the administrator who is in charge of managing the Nebula Device.
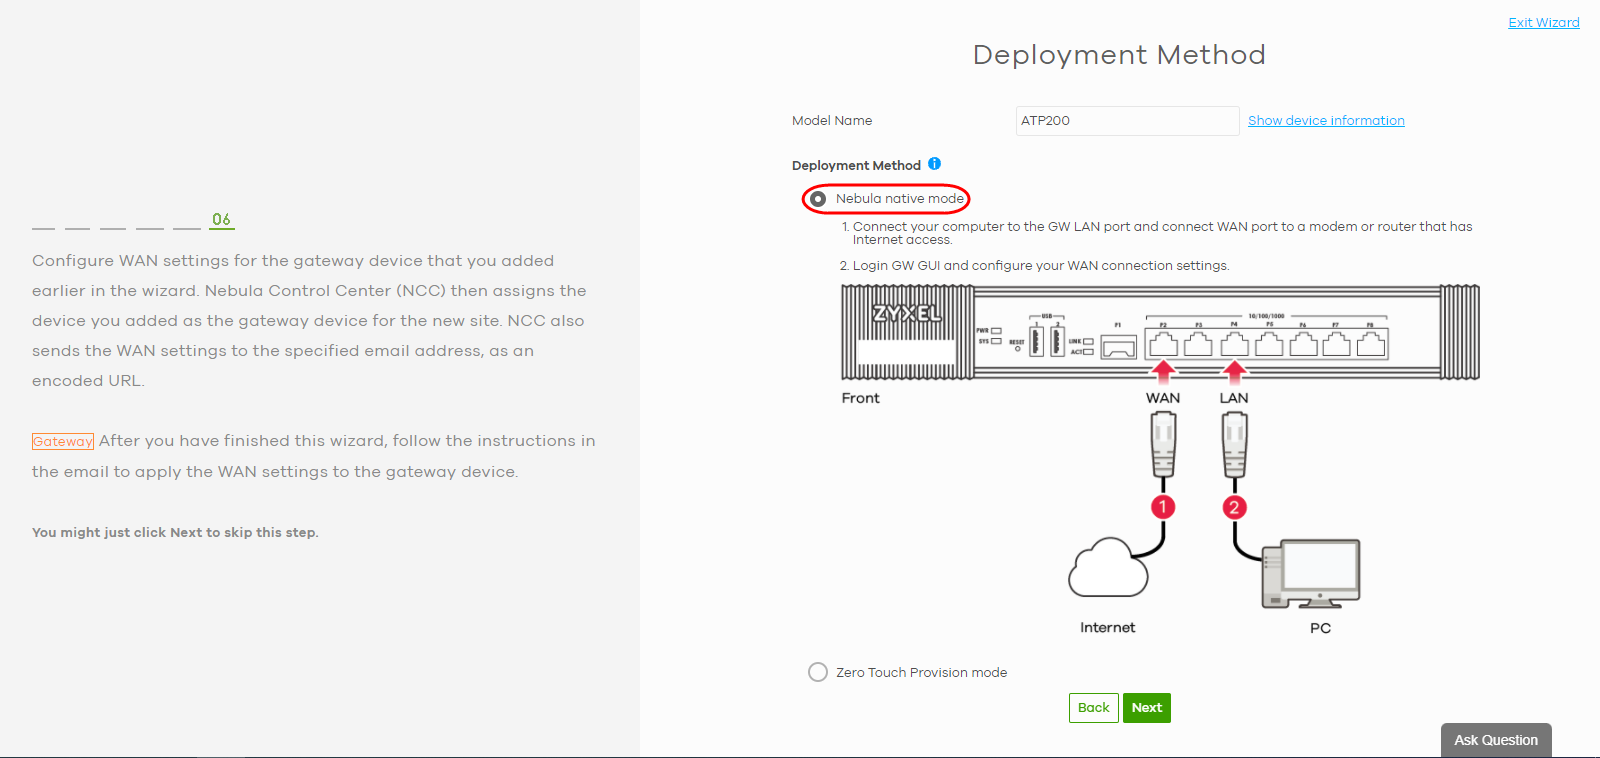
Nebula Native Mode
To use the Nebula native mode deployment method, perform the steps described in On the Nebula Device.
Zero Touch Provision Mode
To configure the Zero Touch Provisioning (ZTP) settings, do the following in NCC:
1 Enable VLAN Tag and configure the VLAN ID (1 – 4094) for the WAN port.
2 Select Static/DHCP/PPPoE/PPPoE with static IP for the WAN type of the Nebula Device.
3 If you select DHCP, enter the MTU (Maximum Transmission Unit) to set the maximum size (1280 – 1500) of each data packet, in bytes, that can move through this interface.
If you select Static, enter the IP Address, Subnet Mask, Default Gateway, First/Second DNS Server, and MTU (1280 – 1500).
If you select PPPoE, select the Authentication Type, enter the Username, Password, and MTU (1280 – 1492).
If you select PPPoE with static IP, select the Authentication Type, enter the Username, Password, IP Address, Default Gateway, First DNS Server and MTU (1280 – 1492).
4 Click Next.
5 Select I will install Firewall by myself to receive an activation email and activation link/file.
Alternatively, if you want another administrator to activate the Nebula Device, enter the recipient’s Email Address.
Alternatively, if you want another administrator to activate the Nebula Device, enter the recipient’s Email Address.
6 Click Next.
7 Select where the Nebula Device will get and install the activation file, from a computer or through a USB drive.

On the Nebula Device
1 Back up the current configuration (in case you want to return to On Premises mode later).
2 Reset the Nebula Device if it was previously configured.
3 Connect the Nebula Device’s WAN port to a modem/router that has Internet access.
4 Connect your computer to the Nebula Device’s LAN port.
5 If you select Nebula native mode, go directly to step 7.
Click the activation link in the email.
Alternatively, save the activation file in the root directory of a USB drive. Then insert the USB drive into your Nebula Device.
Wait until Nebula Zero Touch Provisioning is successful.
Click the activation link in the email.
Alternatively, save the activation file in the root directory of a USB drive. Then insert the USB drive into your Nebula Device.
Wait until Nebula Zero Touch Provisioning is successful.

6 Click Go to Nebula Control Center to configure the Nebula Device using NCC.
7 When you log into the Web Configurator for the first time or when you reset the Nebula Device to its default configuration, the Initial Setup Wizard screen displays. Choose Nebula Mode to manage your Nebula Device remotely using Nebula Control Center (NCC).
8 Follow the wizard to configure the Nebula Device network settings to connect to NCC.
The screens vary depending on the encapsulation type. Refer to information provided by your ISP to know what to enter in each field. Leave a field blank if you do not have that information.
The screens vary depending on the encapsulation type. Refer to information provided by your ISP to know what to enter in each field. Leave a field blank if you do not have that information.
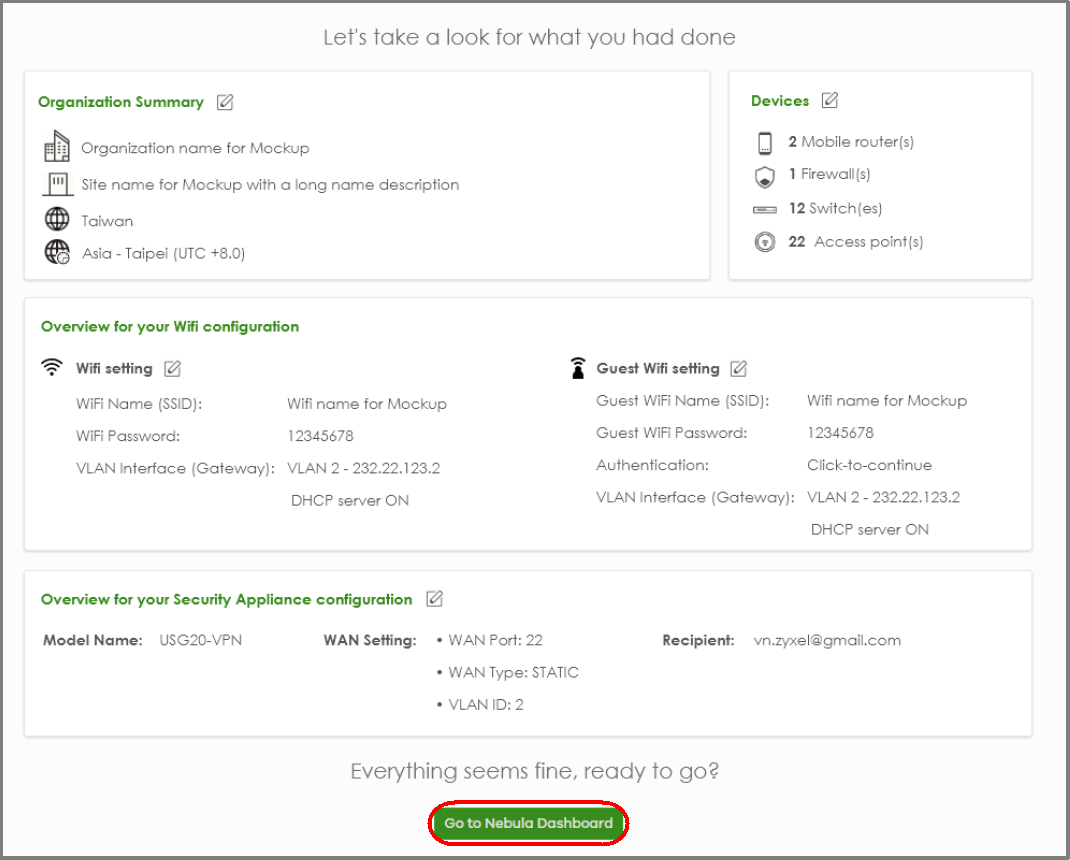
Step 8: View the Summary
1 A summary of the wizard configuration will display after you complete the deployment method.
2 You can click a section’s edit icon ( ) to modify its setting.
3 You must click Go to Nebula Dashboard to save your changes in the wizard; otherwise click Exit Wizard to close the wizard screen without saving the settings.
Step 9: Activate the Trial License(s)
After setting up the wizard, the following screen will appear. You can decide if you want to activate a one-month trial period of Nebula Pro Pack and Nebula Security Services for the organization. Before deciding on the trial license to activate, see License & Inventory Trial Screen for more information.
If you choose to activate a trial license, click to select the trial license(s) and then click OK. NCC will send you an email reminding you to purchase the full license when the trial is close to expiring.
